
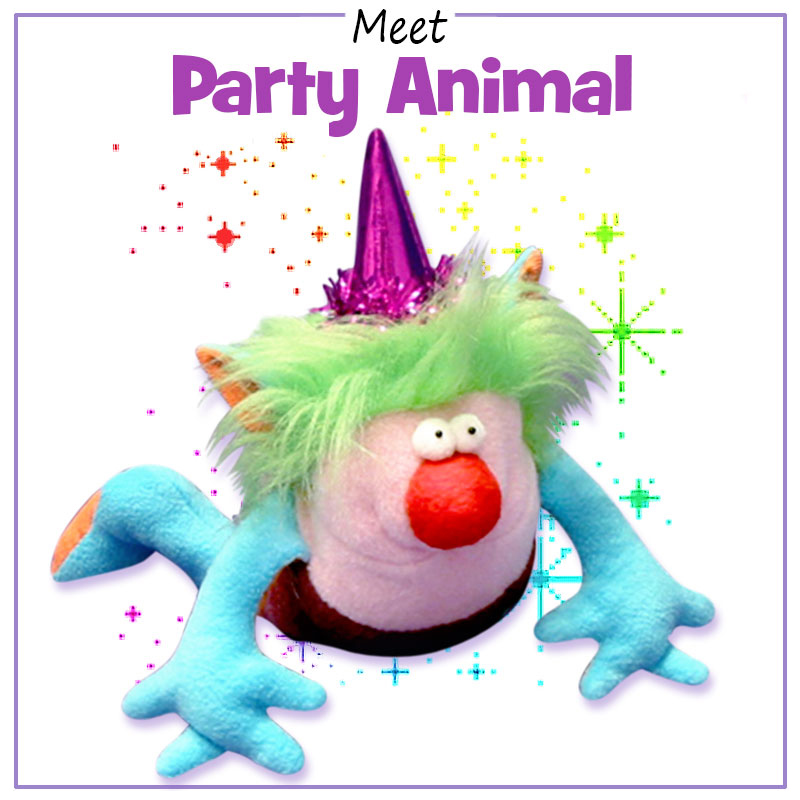
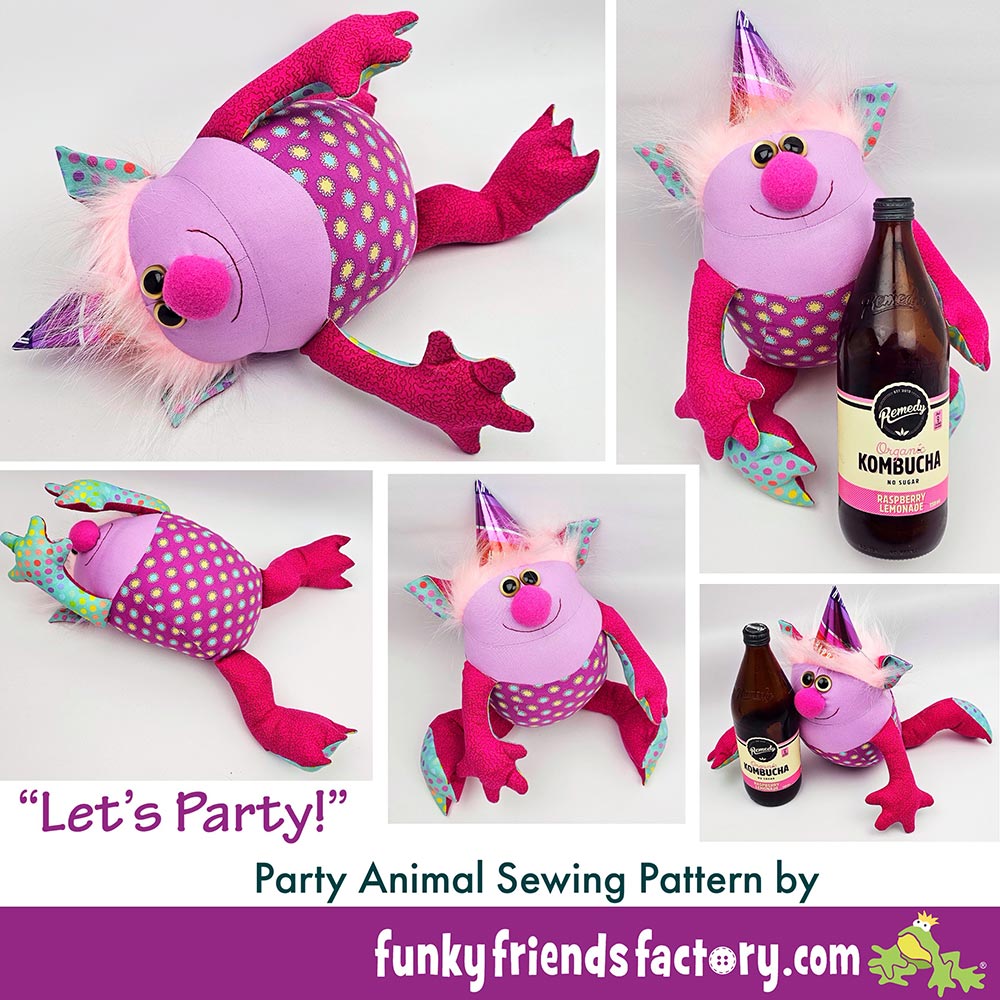
I made this photo tutorial so you can see how to sew my Party Animal sewing pattern ~> scroll down for STEP-BY-STEP photos!
*** PLEASE NOTE – this is ONLY a PHOTO TUTORIAL ***
The FULL PATTERN IS NOT included here.
It is NOT A FREE PATTERN.I have made this photo tutorial so people who have purchased the pattern can SEE how to sew an Party Animal toy (I wanted to explain this so you are not disappointed if you have found this page via a search engine and not from the link in my Party Animal sewing pattern!)
First choose some fabric…
You will need a scrap of Faux (Fake) Fur for Party Animal’s fuzzy hair! (If you need help finding some fur – here is a blog post with info about where to find faux/fake fur.) The rest of the pieces can be made from most fabrics, (including quilting scraps or corduroy). Stretchy fabrics like fleece are best for the nose and ‘googly eyes’.(eg. All types of fleece, velour, chenille and flannelette).
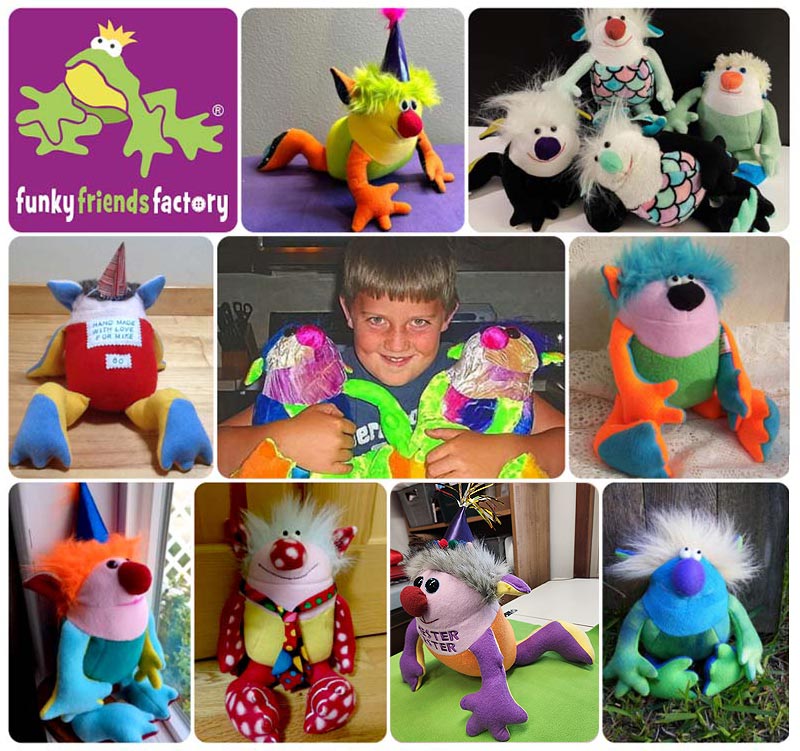
You can sew Party Animal from most fabrics
…AND you can use any colour!
Want to add EMBROIDERY?
Want to personalize with TEXT?
Want to use keepsake CLOTHES?
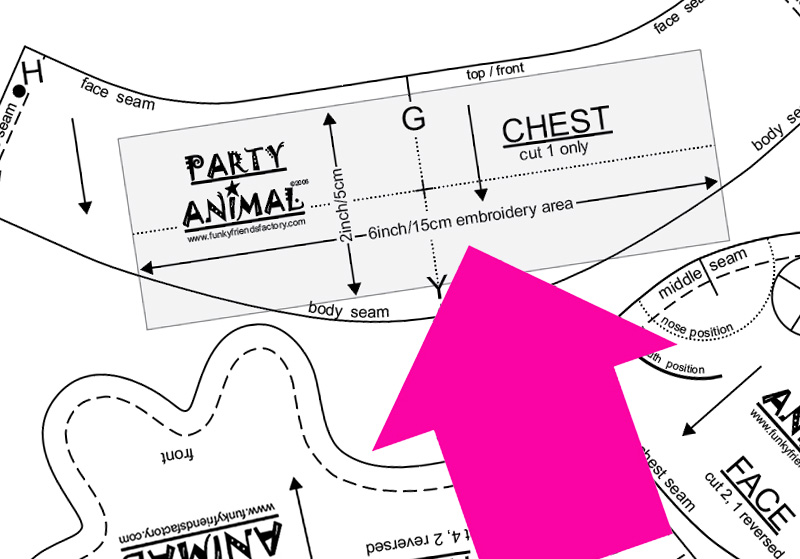
Party Animal has MORE spaces to add special wording than any other Funky Friend!🤩 Before you trace your pieces, plan ahead where you want to use text (or clothing logos from t-shirts, designs from baby clothes, etc).
How to center text/fabric designs:
Look for the grid marks on following pieces to plan your embroidery or center clothing logos:
- CHEST PIECE (2in x 6in long) Perfect long space for “Happy Birthday” or “Congrats!”
- TUMMY PIECE (5in square) Great for t-shirt logos, names and dates.
- 2x BODY PIECES (5in squares) Great for logos, poems, birth statistics.
What text should use?
Use anything you like! Add a name, date, special greeting (like “Happy 1st Birthday” or “Congrats!”), a meaningful poem or saying, or use Party Animal as a fantastic signature/Autograph toy.
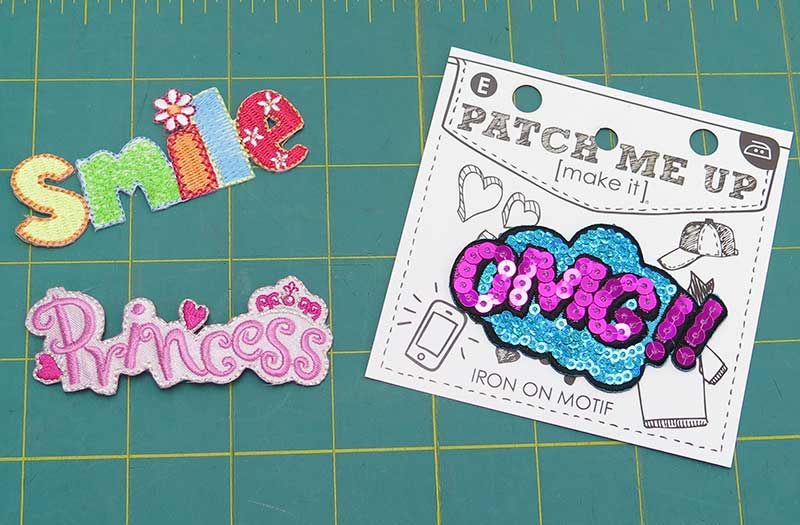
Ways to add text?
Fabric markers, embroidery machine, hand embroidery, pre-cut iron-on letters found at craft stores (see some fun examples below), heat transfer vinyl (HTV) used with a cutting machine.
Right, let’s get sewing!
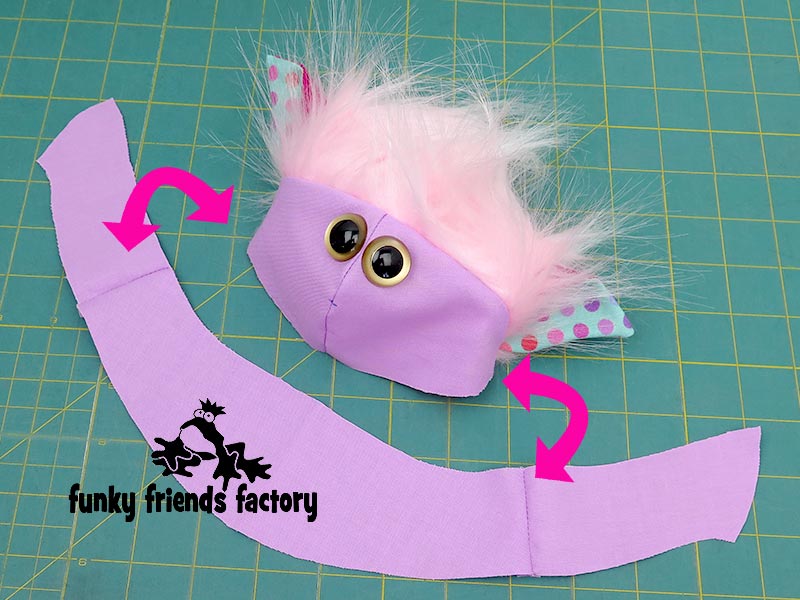
FACE:
STEP 1a
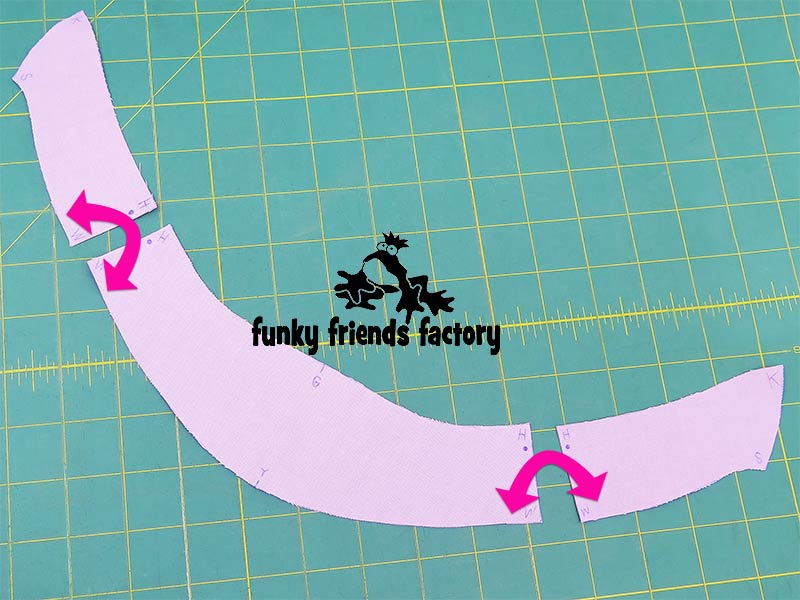
Sew the FACE PIECES together from A – G.
TIP: Clip the seam well, if you are using a woven (non-stretchy) fabric like cotton, so it will turn nice and smoothly.
STEP 1b
Make sure to mark the position of the NOSE and EYES on the front side of the FACE PIECES. This is so that you will know where to place these after the toy is stuffed. (I poke a pin through the fabric from the wrong side to do this)

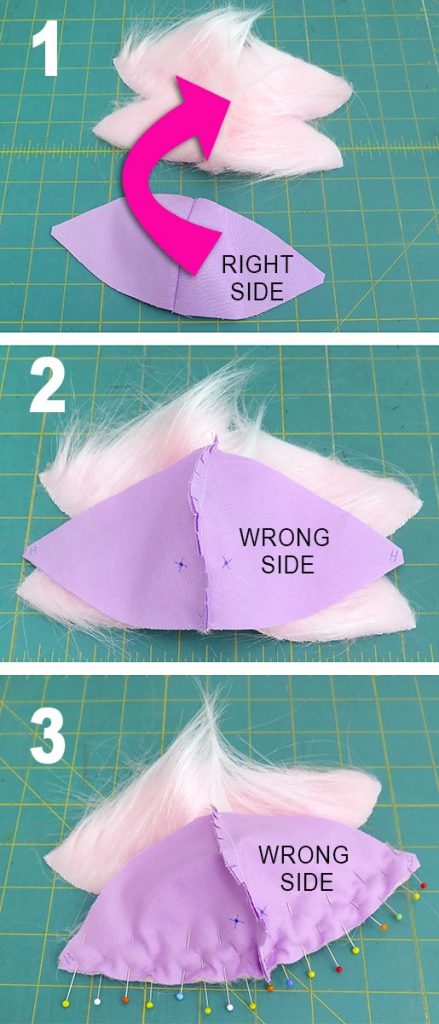
HAIR:
STEP 2a
***IMPORTANT NOTE***
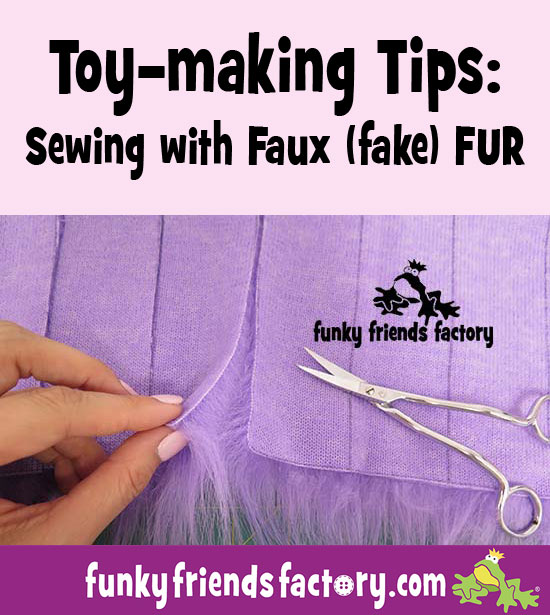
It’s REALLY important NOT to cut the fur pile, just the backing of the fabric, when you cut out the fur pieces. If you have never worked with Fur fabric – there’s a VIDEO to show you how to cut fur in this blog post called: Where to find Faux Fur fabrics online – plus tips for sewing with Fake Fur.
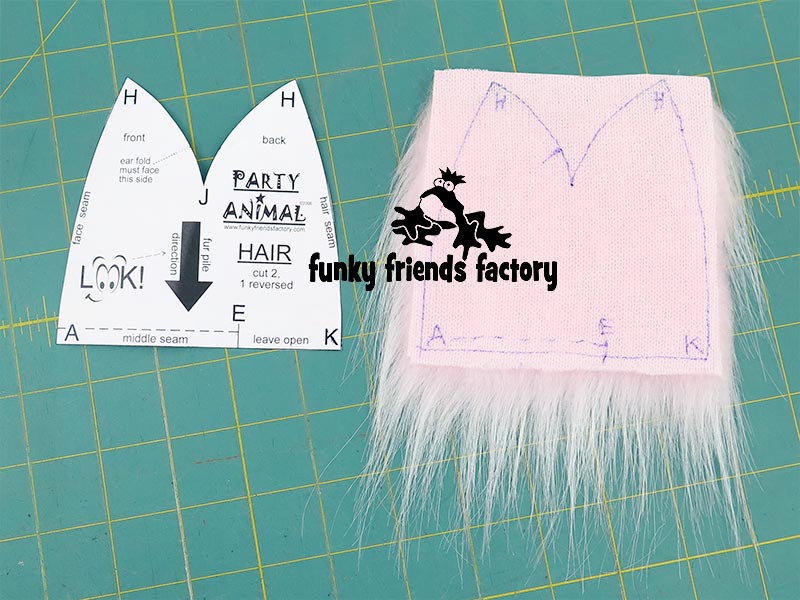
Cut out the HAIR PIECES making sure to pay attention to the direction of the fur. (Line up the black arrow with the direction of the fur pile).
TIP: If you don’t do this the hair won’t stick up and look like a WILD party animal!
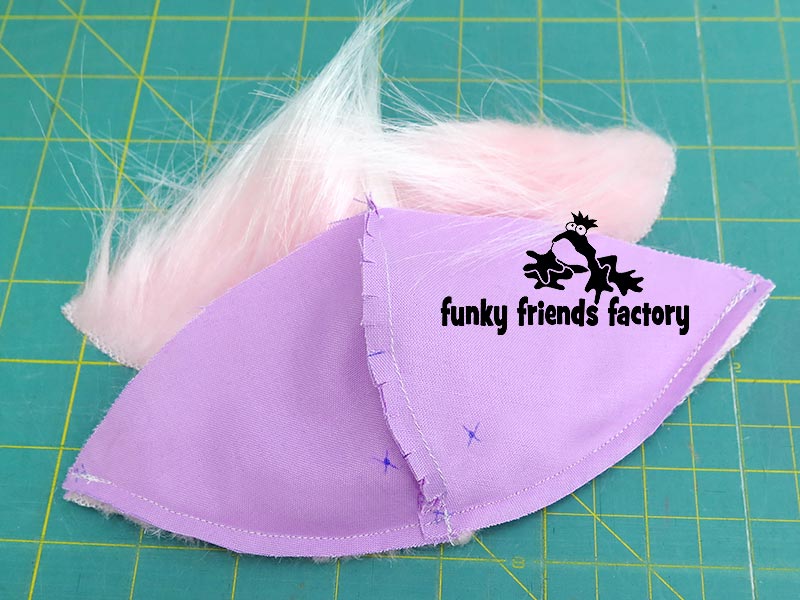
STEP 2b
Pin the HAIR PIECES together from A – E, making sure all the fur is tucked inside between the pieces.
STEP 2c
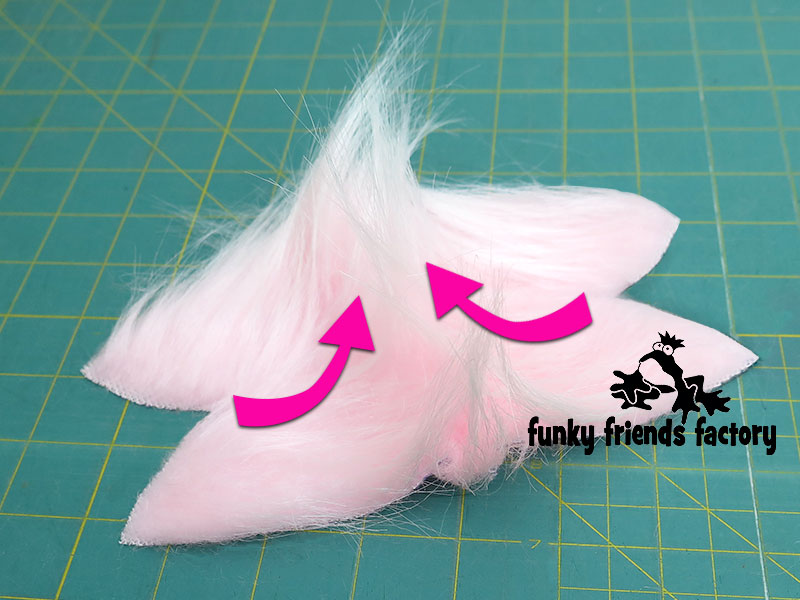
Sew the HAIR PIECES together from A – E.
TIP: Double-check that the fur pile is correct… the fur should stick up at the middle seam.
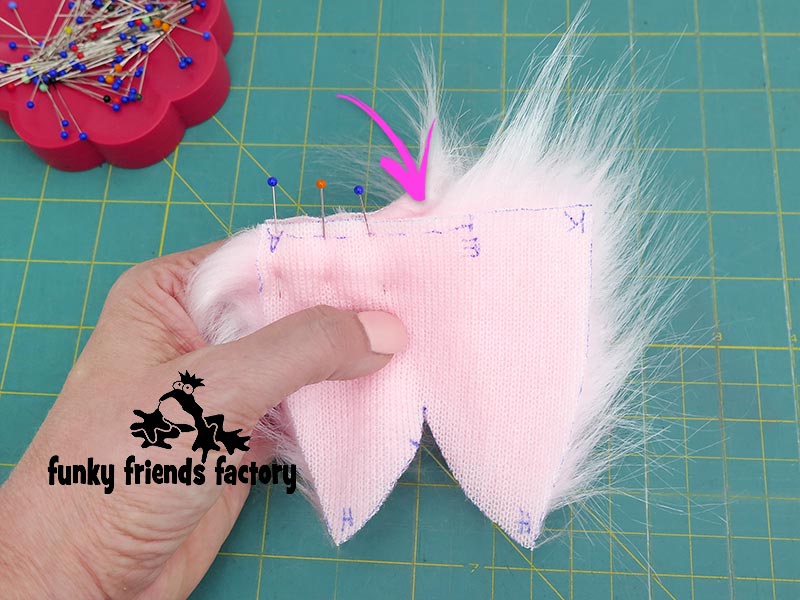
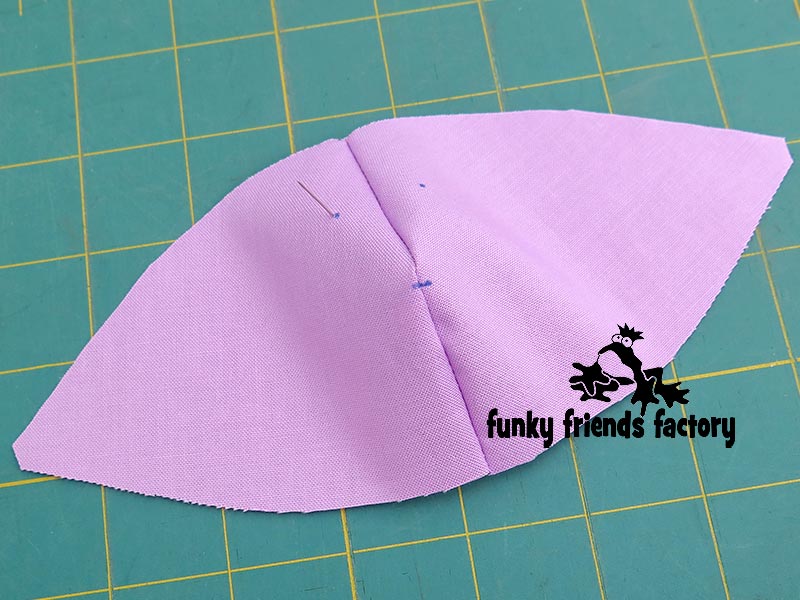
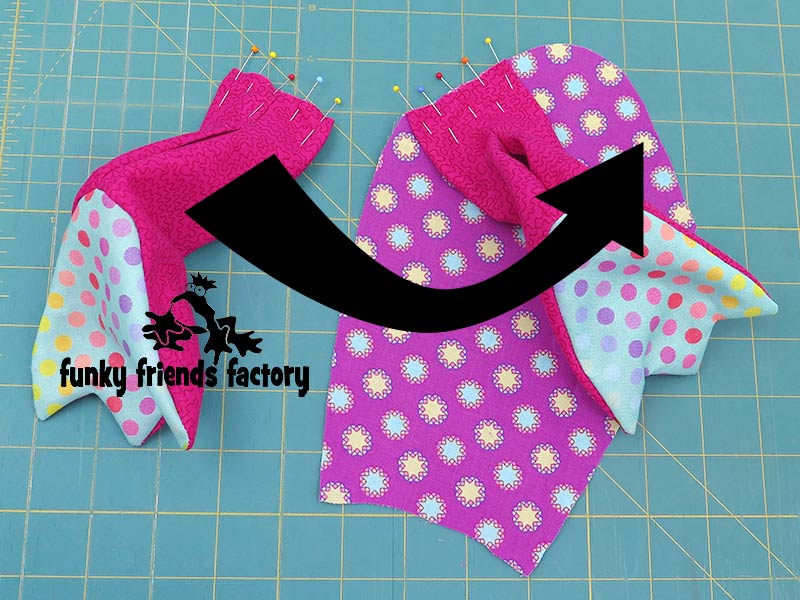
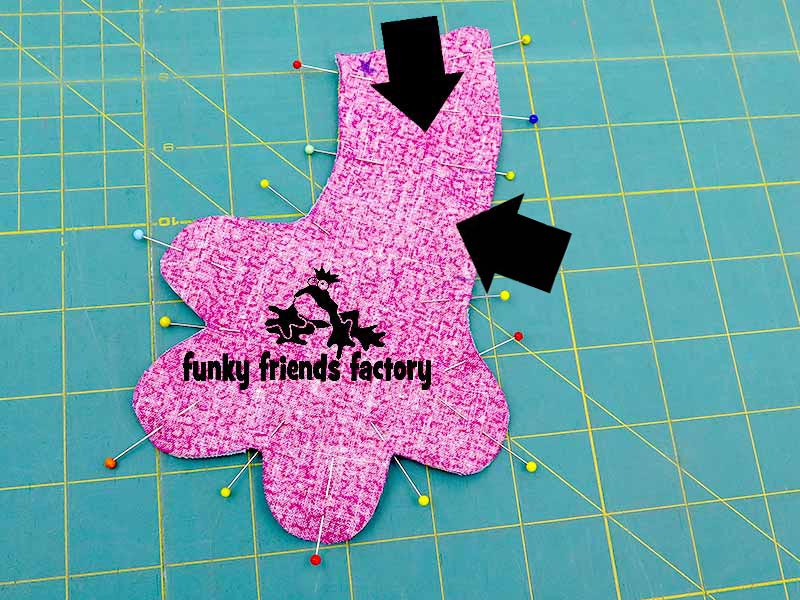
STEP 3a
Pin the FACE PIECES to the HAIR PIECES from H -A – H, again making sure to push all of the fur pile ‘inside’ the seam.
STEP 3b
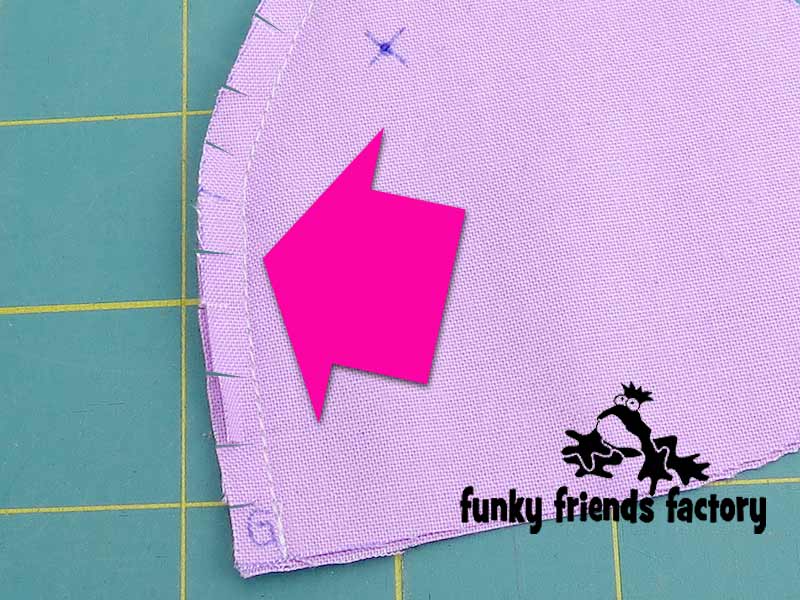
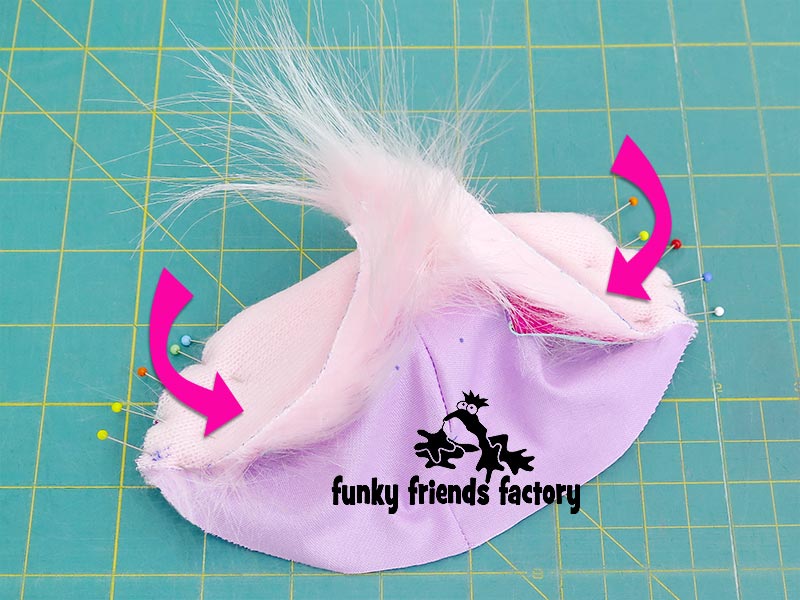
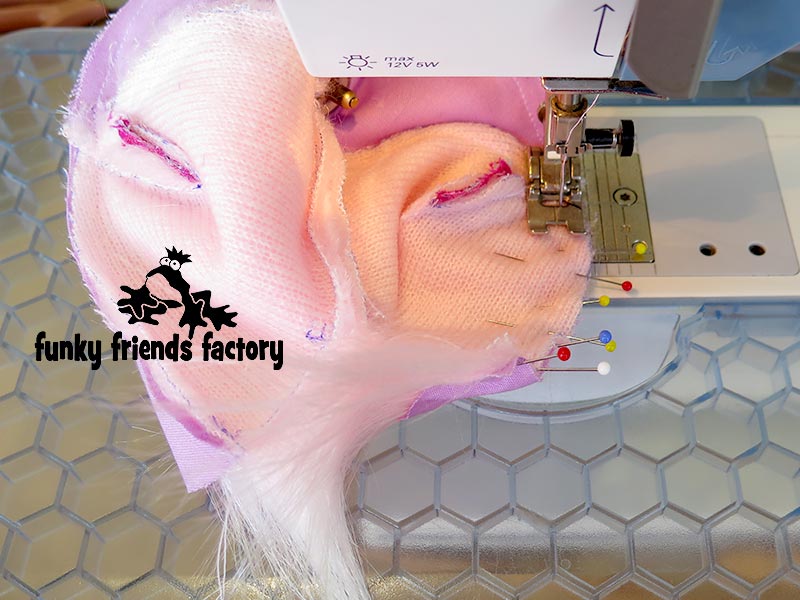
Sew the FACE PIECES to the HAIR PIECES from H -A – H.
TIP: Fur is VERY SLIPPERY – so double check that you have caught both layers in the seam. (Even though I used so many pins, my pieces STILL slipped and I had to go back and sew another line of stitching – see the pink arrow in the photo below).

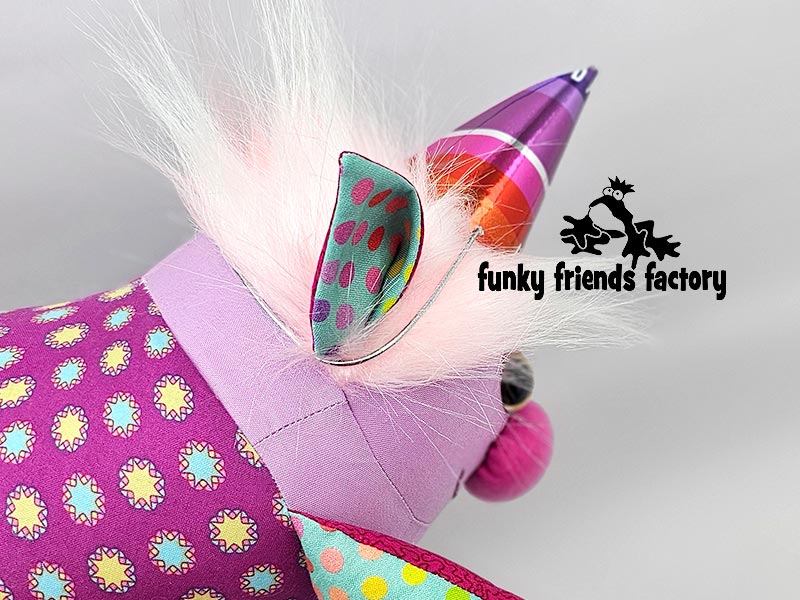
EARS:
STEP 4a
Sew the EAR PIECES together in pairs (matching one Main fabric and one Contrast fabric piece) and leaving them open along the inside edge for turning.
STEP 4b
Sew the EAR PIECES together. Trim the seam allowance to 3mm (⅛ inch) , paying attention to the ‘tip’ of the EAR PIECES. (This is where it’s most important to remove the extra bulk.)
STEP 5a
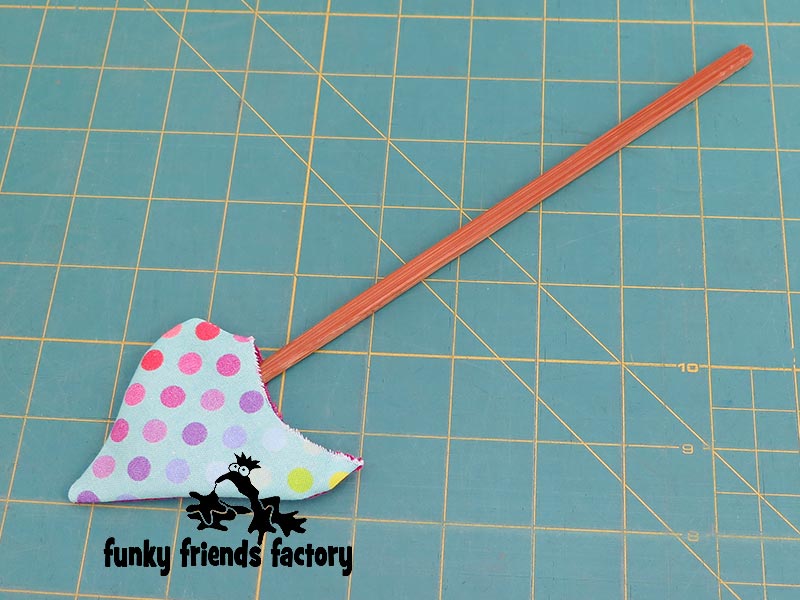
Turn the EARS right sides out. *Do NOT stuff the EARS!* I like to use a wooden chopstick to help turn the seams nicely. (Run the end of the stick back and forth along the stitching inside the EARS until the seam is nice and smooth).
STEP 5b
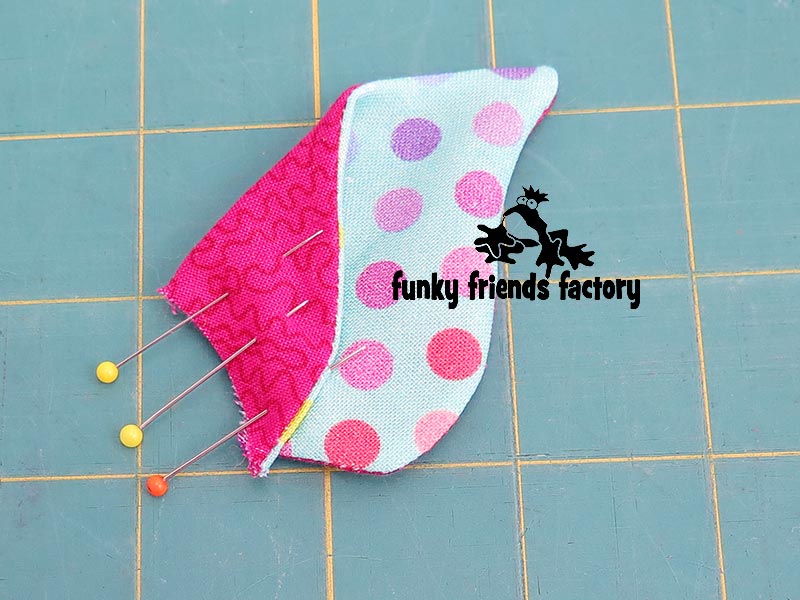
Fold the EAR PIECES with the contrast fabric to the inside, as shown by the dotted line pattern marking and pin the edges together at the open edge.
STEP 6a
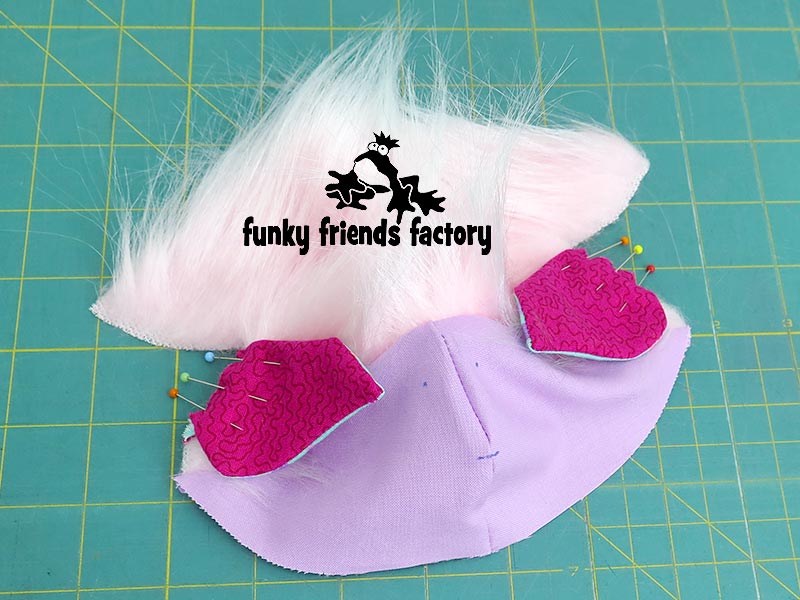
Pin the EARS to the HAIR PIECES with the ear folds facing the side with the ear fold pattern marking (dotted line).
STEP 6b
Sew the EARS in position with a 3mm/⅛ inch seam allowance. (You can do a hand tack /basting stitch instead, if you want!)
TIP: This is V-E-R-Y IMPORTANT with fur fabrics because they are very slippery and this extra row of stitching stops the EARS from slipping as you sew.

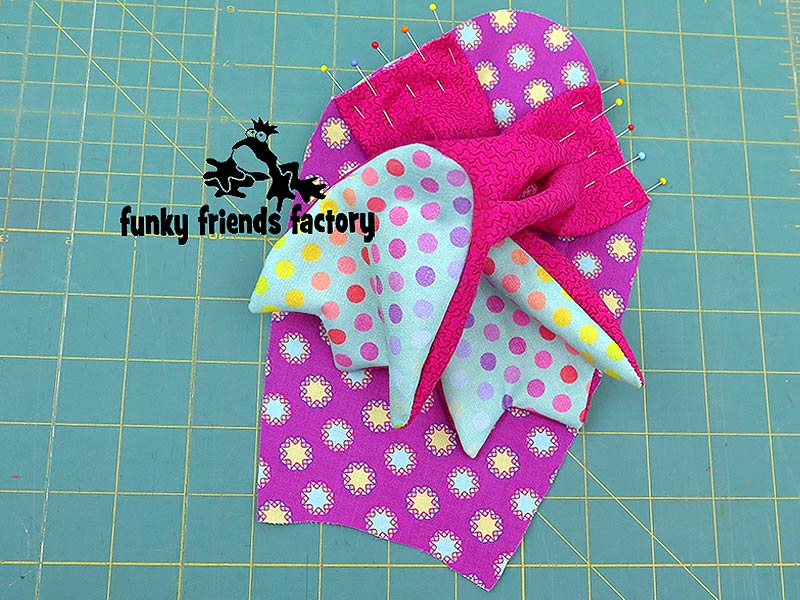
STEP 7a
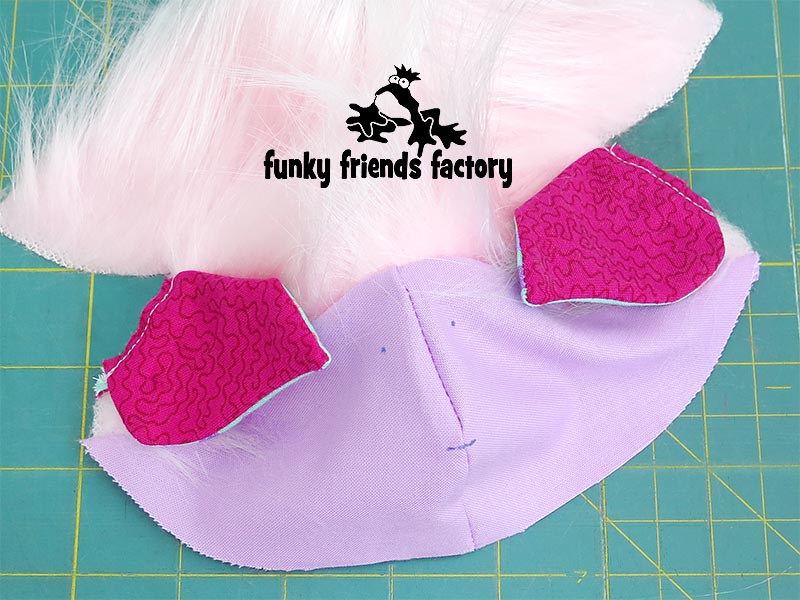
Fold the HAIR PIECES, right sides together, and pin the ear darts closed with the EARS in between the 2 layers.
TIP: BEFORE YOU SEW ~> Check that the folds of the EARS face forwards. (You should be able to see the contrast fabric of the ‘inside’ part of the ears AND the nose pattern marking on the RIGHT side of the fabric of the FACE PIECES.)
STEP 7b
Sew the EARS in place as you sew the ear darts of the HAIR PIECES closed, from J – H.
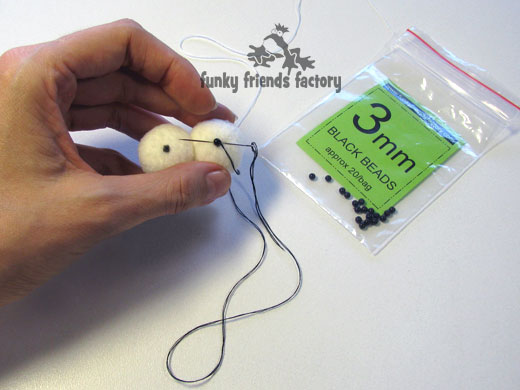
EYES:
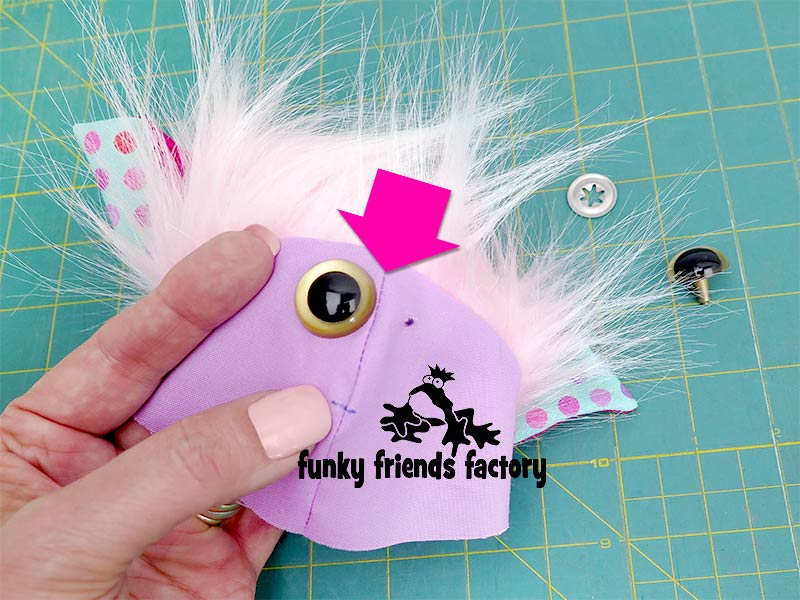
STEP 8
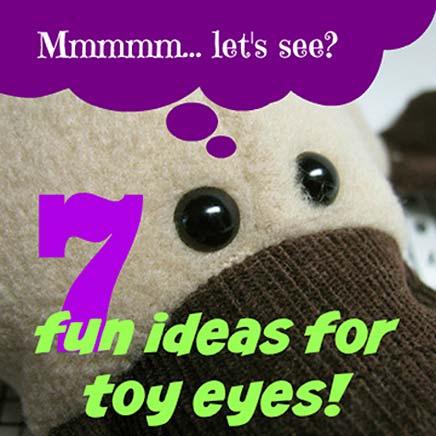
PLESE NOTE! There are so many ways to do toy eyes. I have included TWO in this tutorial:
Option 1: ORIGINAL / ALTERNATIVE EYES
The original Party Animal had Googly Eyes which were sewn on by hand AFTER Party Animal was stuffed. If you want to do these Alternative Eyes – they are only added later in STEP 26)
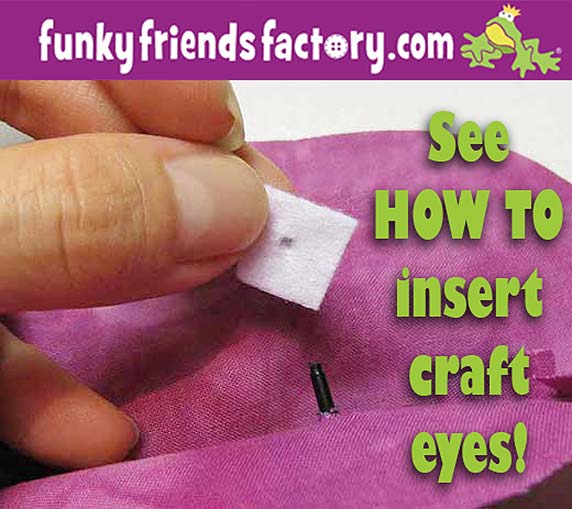
Option 2: If you are using CRAFT EYES insert these now…
TIP: I have a tutorial to show you how to insert craft eyes on my blog.
AND… Checkout this blogpost for more fun ways to do eyes ~>
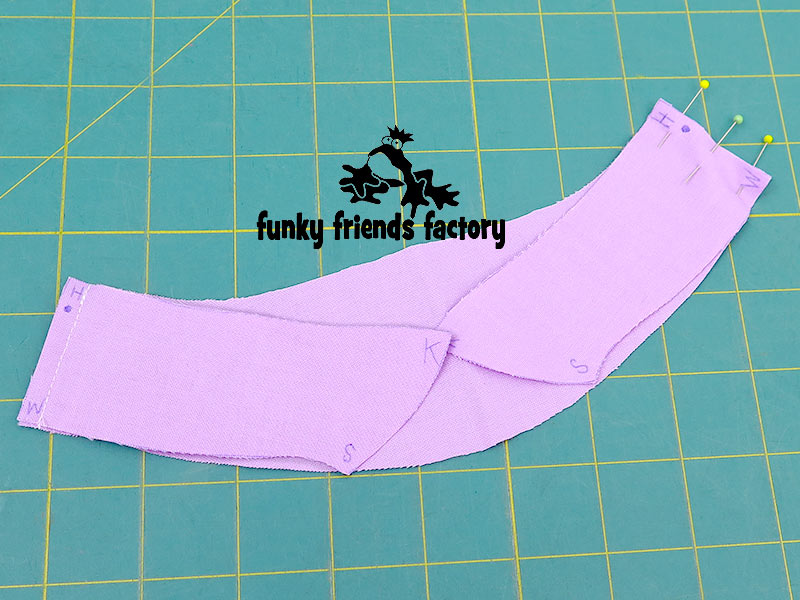
NECK & CHEST:
STEP 9a
Pin the NECK PIECES to the CHEST at the side seams…
STEP 9b
…and sew them together from H – W.
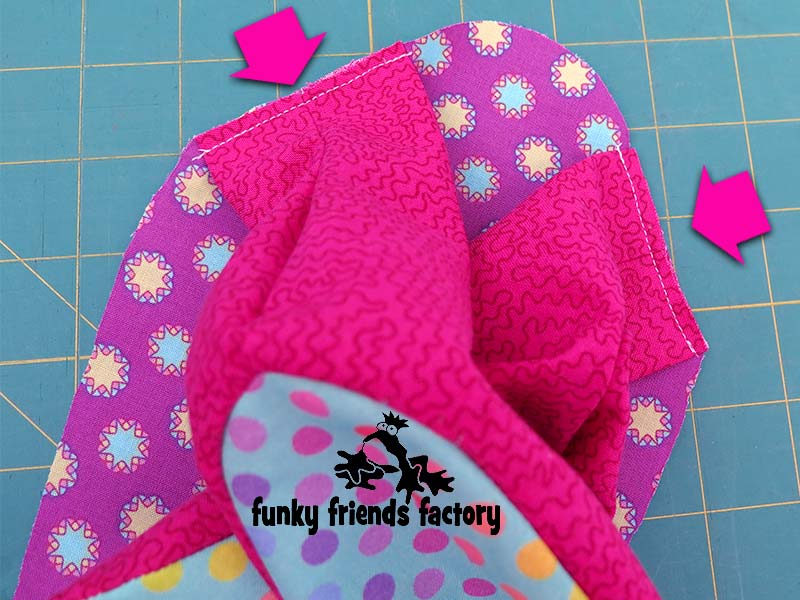
STEP 10a
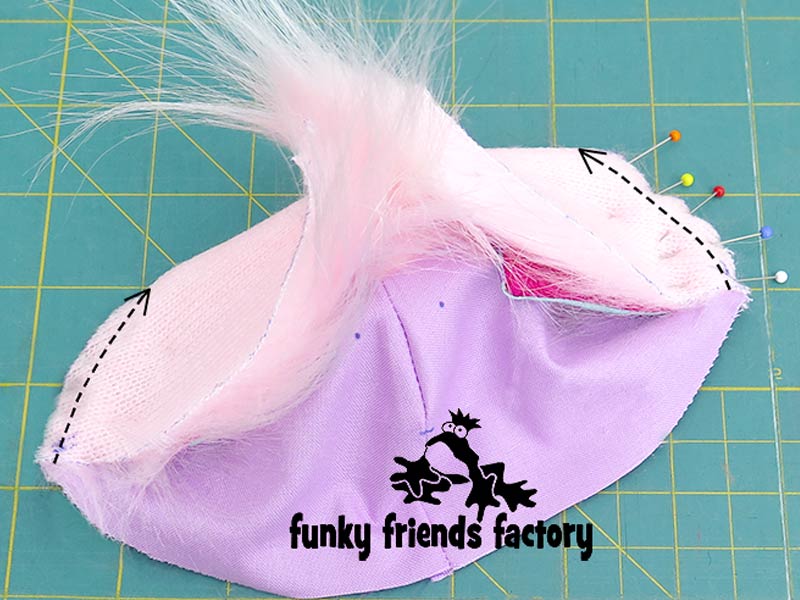
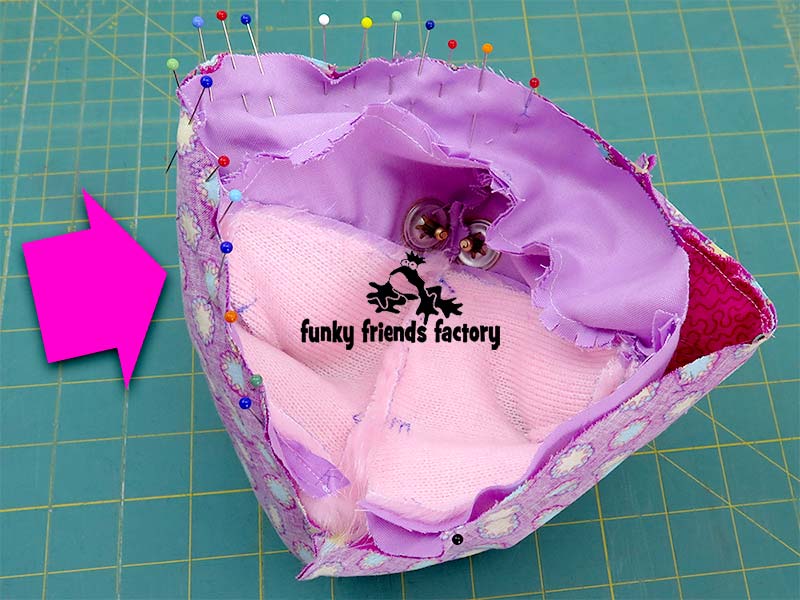
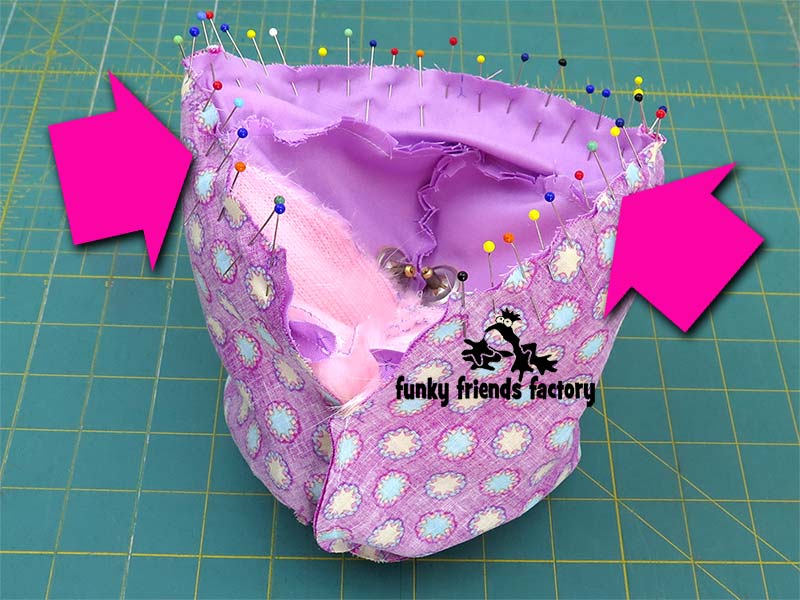
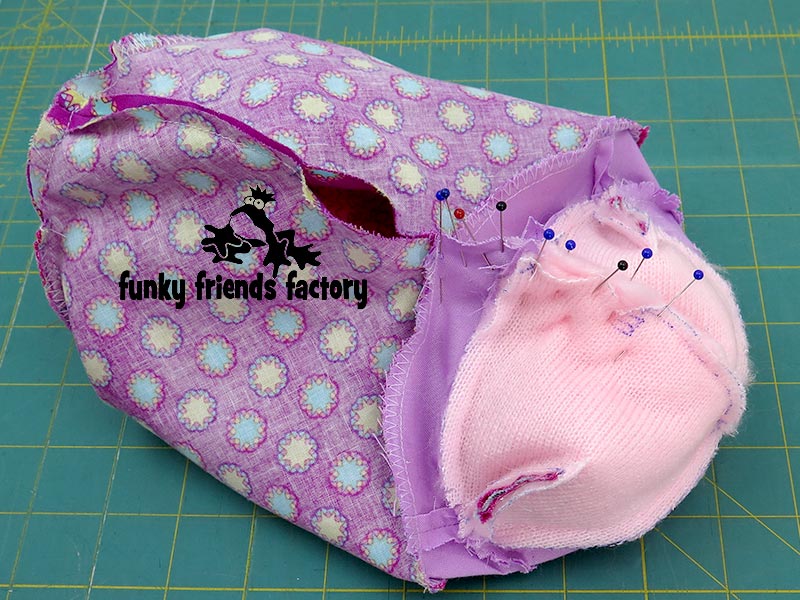
Pin the CHEST & NECK PIECES to the FACE & HAIR PIECES and…
TIP: Use LOTS of pins especially for the HAIR PIECES so the fur won’t slip as you sew! Here you can see the pieces ‘from the back’.
STEP 10b
sew them together from K – H – G – H – K.
TIP: Sew the pieces together with the fur facing UP so you can see that you are catching it in the seam.
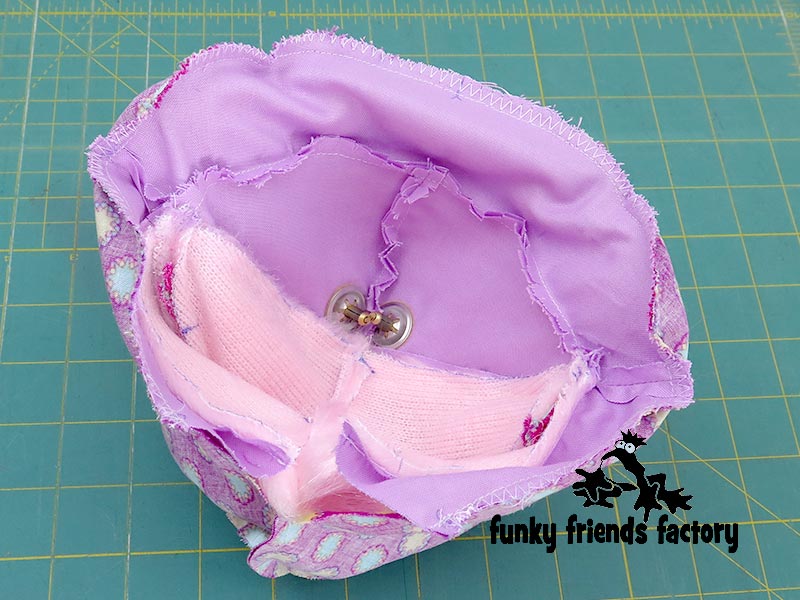
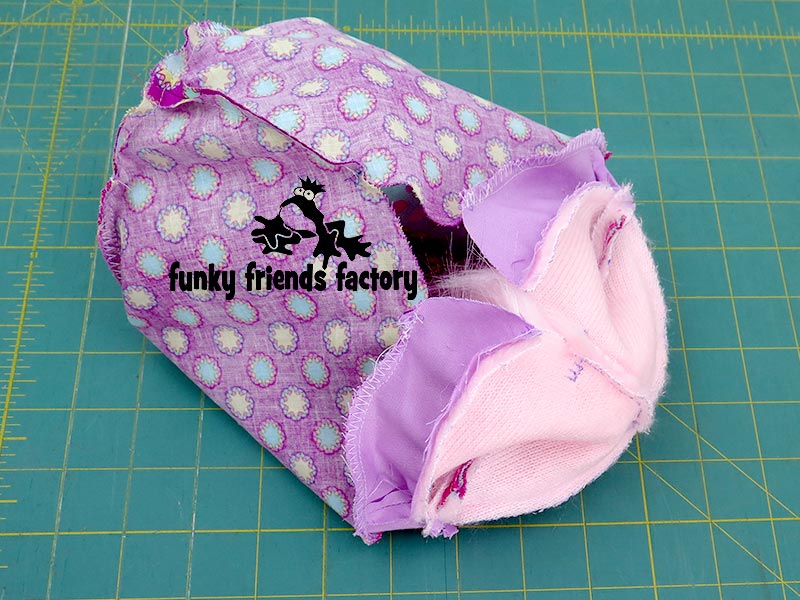
STEP 10c
Clip the seam allowance so the pieces will turn nice and smoothly. (*** This is NOT needed if you are using a stretchy fabric like fleece or minky because this seam is not very curved).
LEGS:
STEP 11a
Sew the LEG PIECES together from L – M, leaving the turning gap open.
STEP 11b
Sew the LEG PIECES together from N – O.
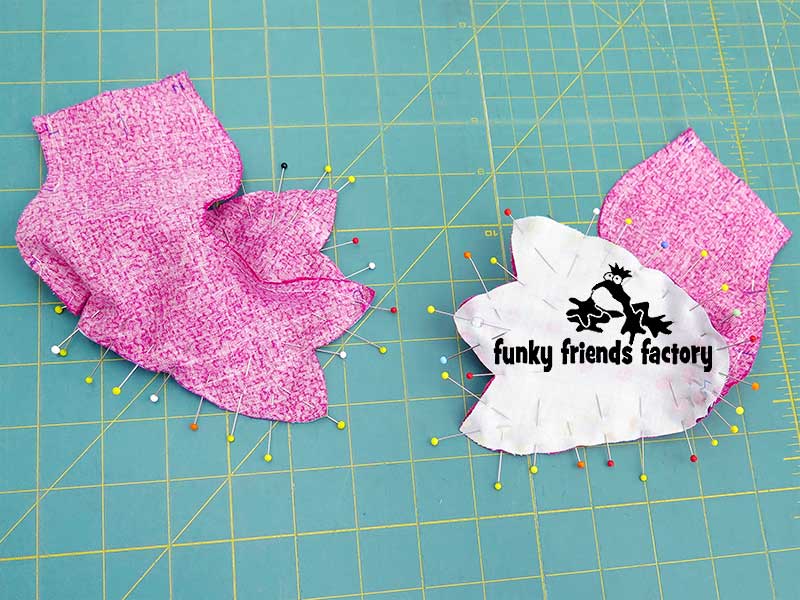
STEP 12a
Pin and sew each FOOT PIECE in place matching point O and M.
TIP: I have a tutorial to show you how to sew the FOOT PADS in place. Click HERE to check it out!
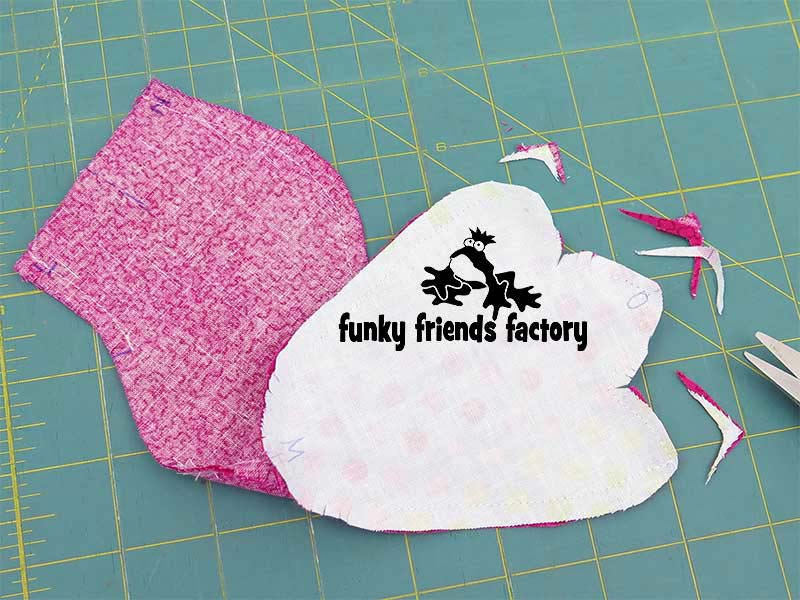
STEP 12b
Trim the pointy seams at the tip of each ‘toe’ (to reduce the bulk of the seams) and clip the seams in between the ‘toes’ (to help them turn more easily).
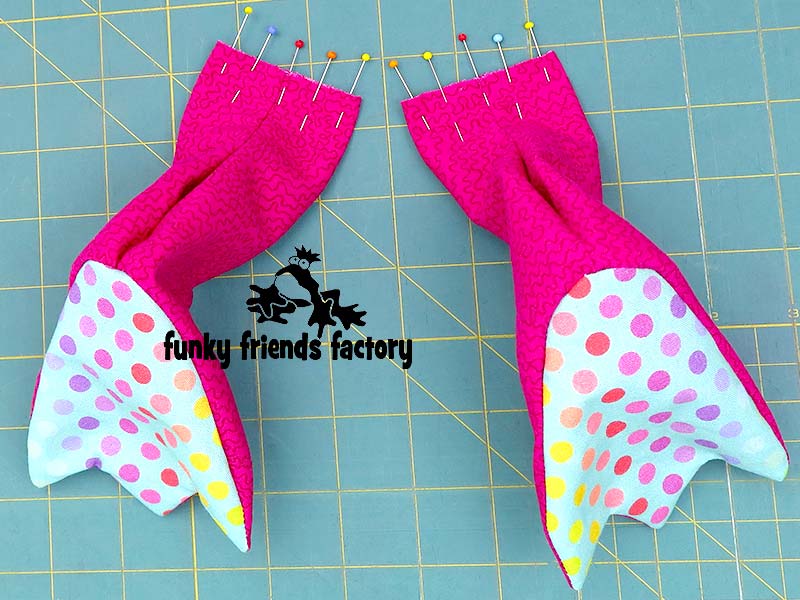
STEP 13a
Turn the LEGS right sides out. Fold the straight edges of the LEG PIECES, as shown by the pattern markings, so that the seams are together at the middle, and pin them closed.
STEP 13b
Pin the legs to the TUMMY PIECE. **** PLEASE read the IMPORTANT TIP below before you SEW the legs on!****
IMPORTANT TIP: The trick to getting the feet the right way up, is to lay the TUMMY PIECE down, with the right side of the fabric facing UP, then pin the LEG PIECES to the TUMMY PIECE with the knees pointing DOWN (touching) the TUMMY and the stuffing gaps facing UP.
STEP 13c
Double check that you have the right side of the fabric of the TUMMY PIECES and the FOOT PADS facing UP!!!!
STEP 13d
Sew the legs in place with a 3mm/⅛ inch seam allowance.
BODY & TUMMY:
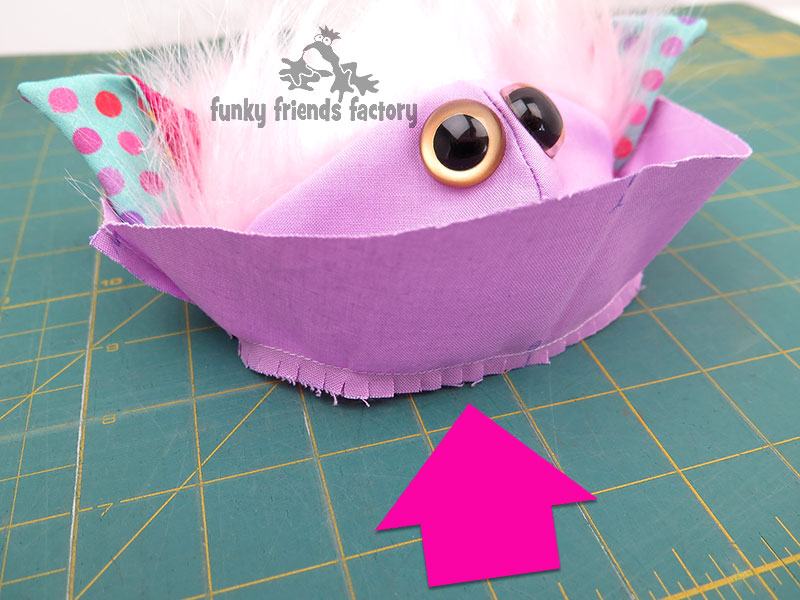
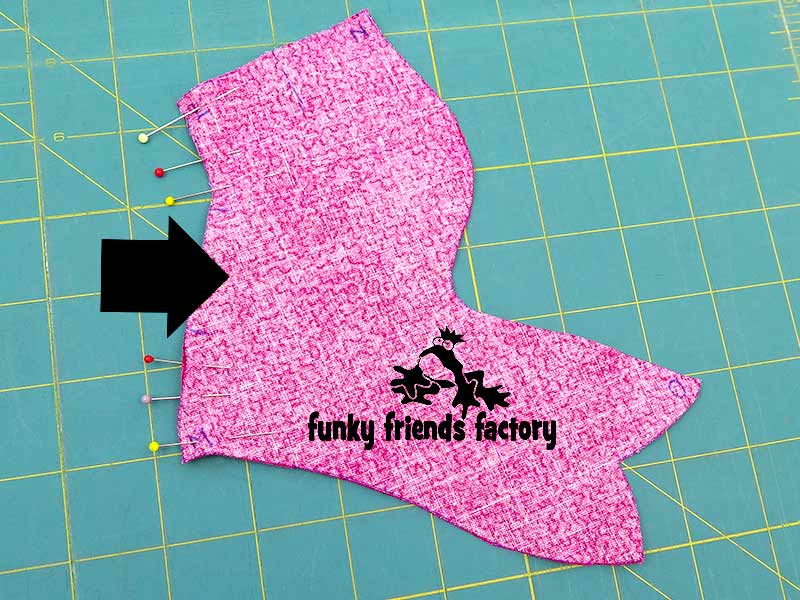
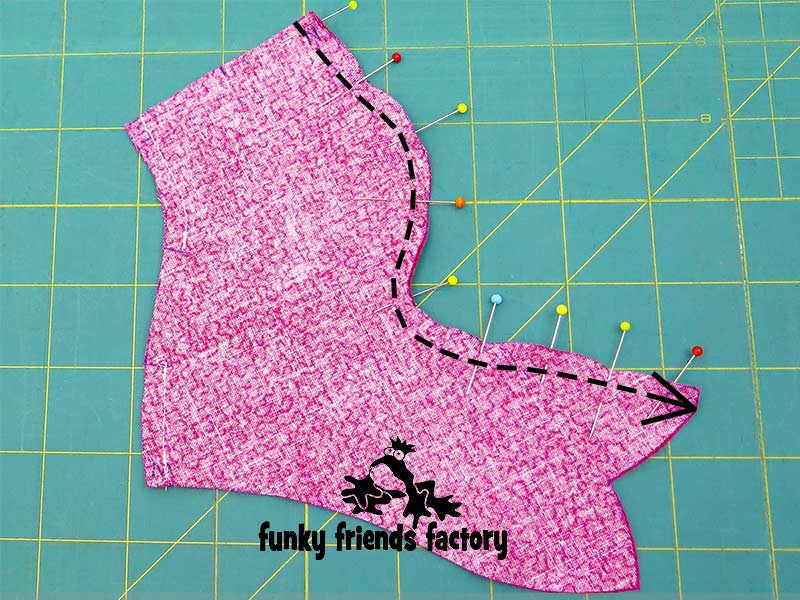
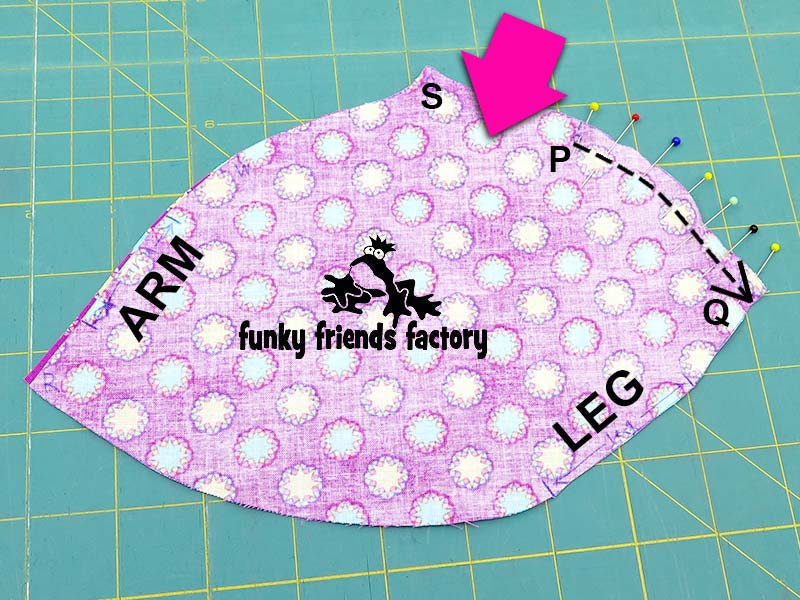
STEP 14
Sew the BODY PIECES together from P – Q, leaving them open at the front between S and P (see the pink arrow in the photo below).
TIP: The BODY PIECES are a funny shape! Please, please, pretty pleeeeeeeeeeeeeeeeeeez mark the letters, plus ‘ARMS’ and ‘LEGS’ on the fabric pieces (if you haven’t already done this). It is SO easy to get the BODY PIECES upside down, or the wrong way around, if you don’t!
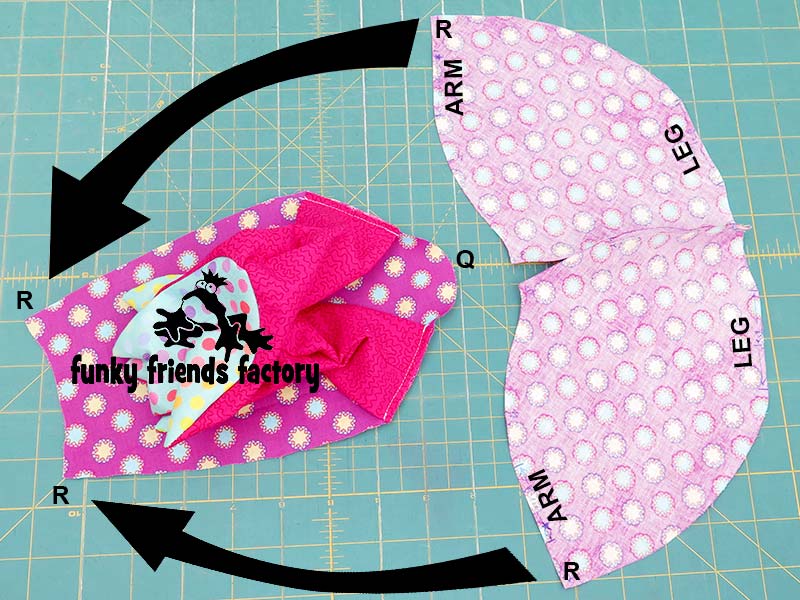
STEP 15a
Pin the BODY PIECES to the TUMMY PIECE, with the legs sandwiched between them, matching points R at the front and point Q at the back.
STEP 15a
Sew the BODY PIECES to the TUMMY PIECE from R – Q – R, on the other side.
TIP: If the toy is for a child – go back and stitch a row of zig-zag stitches across the leg seam. (This will stop them from being pulled off with excited play!)
ARMS:
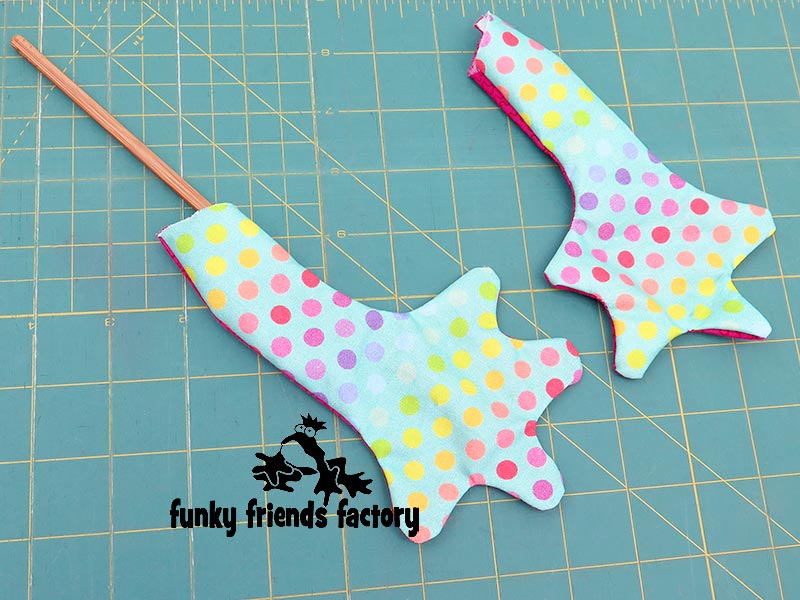
STEP 16a
Sew the ARM PIECES together in pairs (matching one Main fabric and one Contrast fabric piece), leaving them open along the straight edge and stuffing gap.
TIP: Clip the seams of the ARMS really well, especially where they are very curved between the ‘fingers’.
STEP 16b
Turn the ARMS right side out. (Turn the seams using a turning tool/ chopstick as before – LOOK at what a difference it makes!) Pin the ARMS closed at the straight edge.
STEP 17a
Pin the ARMS to the BODY& TUMMY PIECES, as shown on the pattern markings.
STEP 17b
Check that the ARMS are pinned to the right side of the fabric of the BODY PIECES – and that the star pattern markings are lined up correctly. Sew the ARMS in place with a 3mm/⅛ inch seam allowance.
CHEST SEAM:
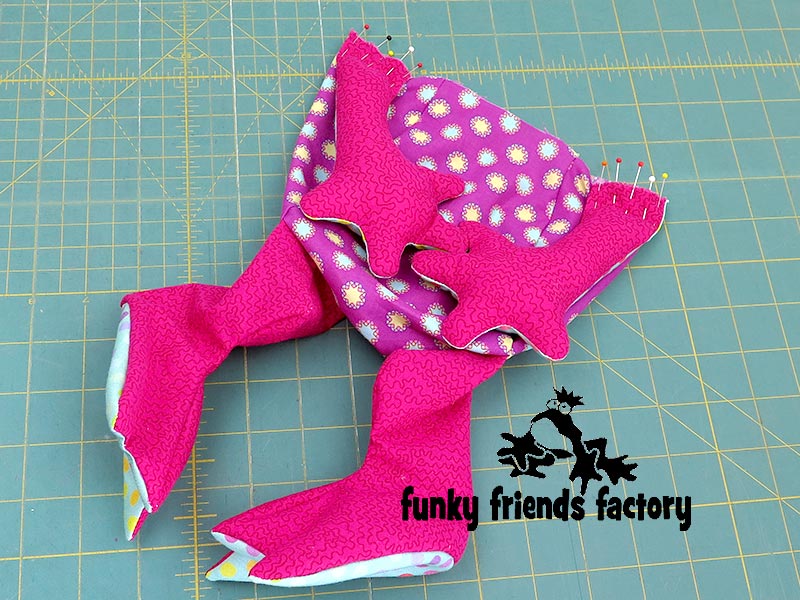
STEP 18a
Push the ARM PIECES and LEG PIECES ‘inside’ the body.
STEP 18b
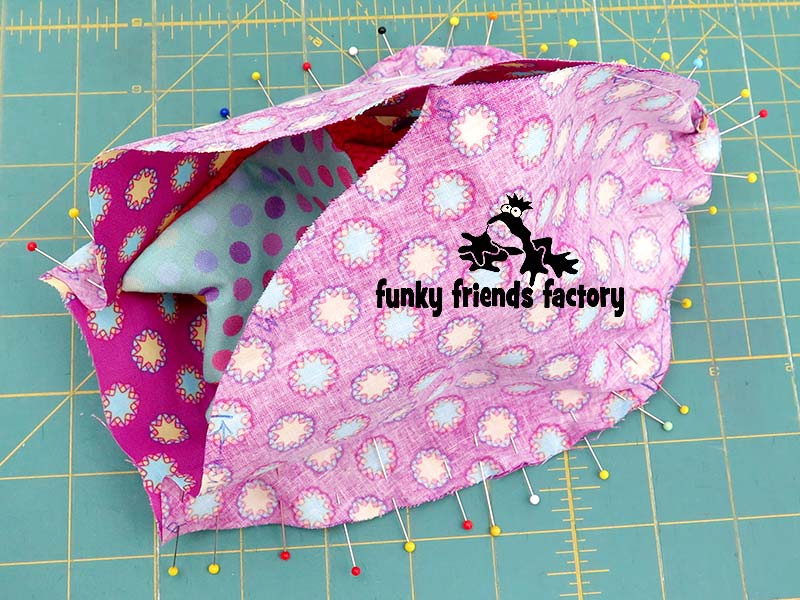
With the head right sides out, pin the NECK & CHEST PIECES to the BODY & TUMMY PIECE along the chest seam.
I am adding a few EXTRA photos so you can see the way I pin this important seam!
1. Pin point S on both side first.
2. Pin point Y next.
2. Pin between S and Y on one side.
TIP: IF you are a beginner, it might be easier to sew one side at a time. Sew this side now (from the center of the neck Y – S) BEFORE you pin the other side between Y – S.
3. Pin between Y and S on the other side.

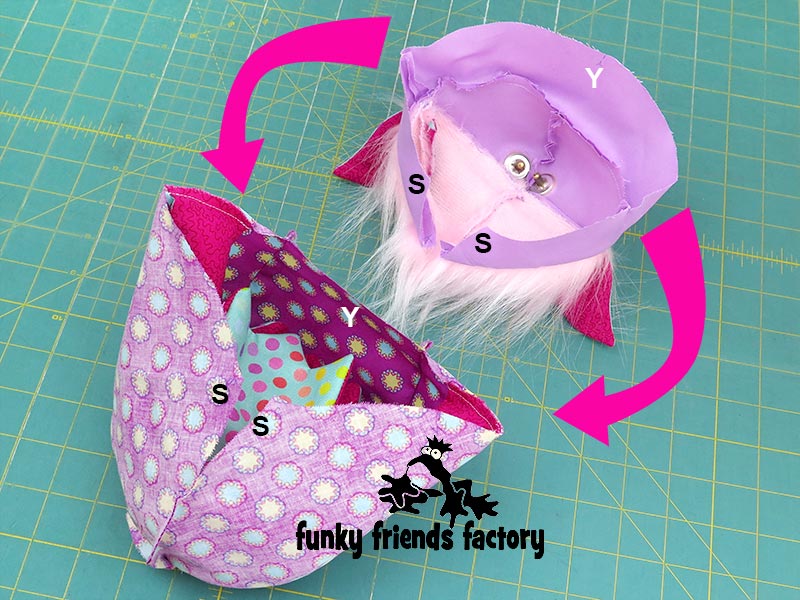
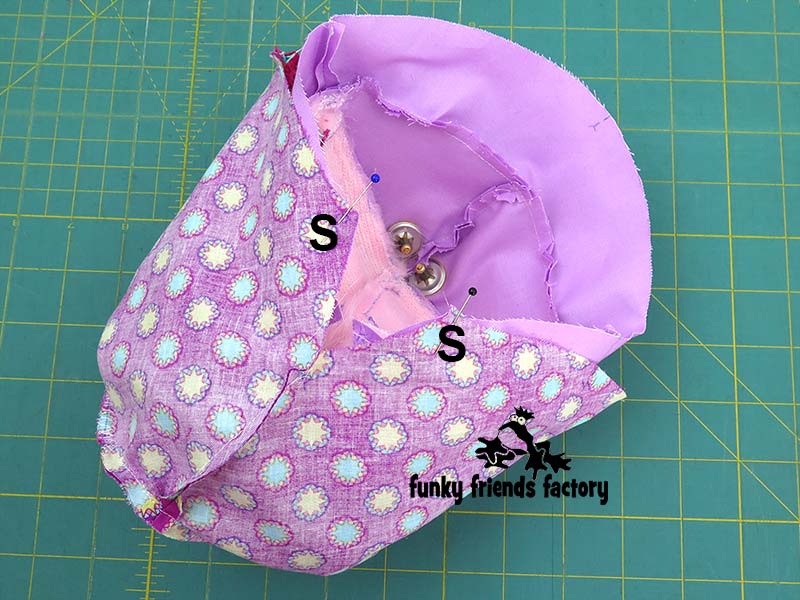
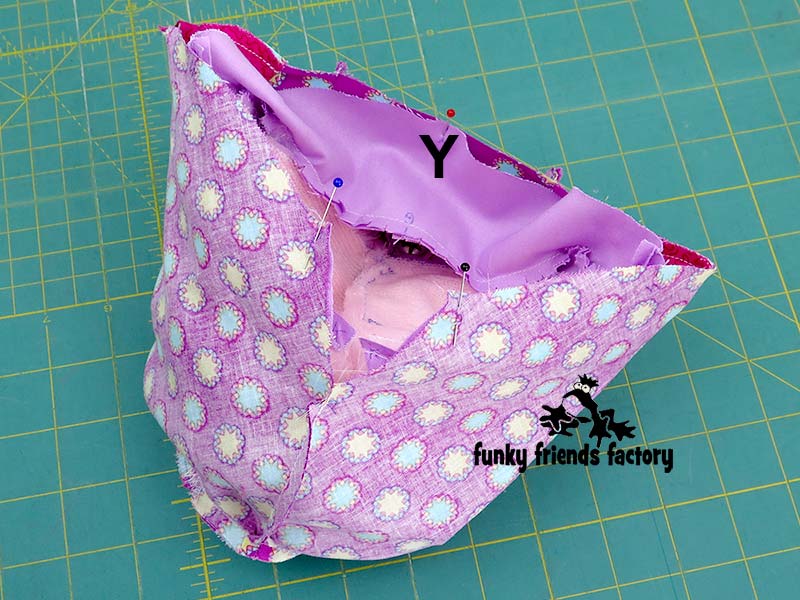
STEP 19
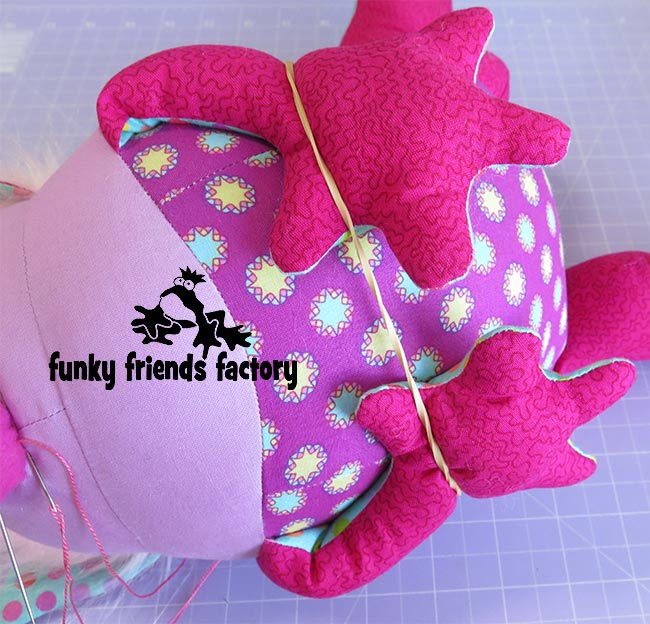
Sew the chest seam from S – Y – S, with the ARMS in between.
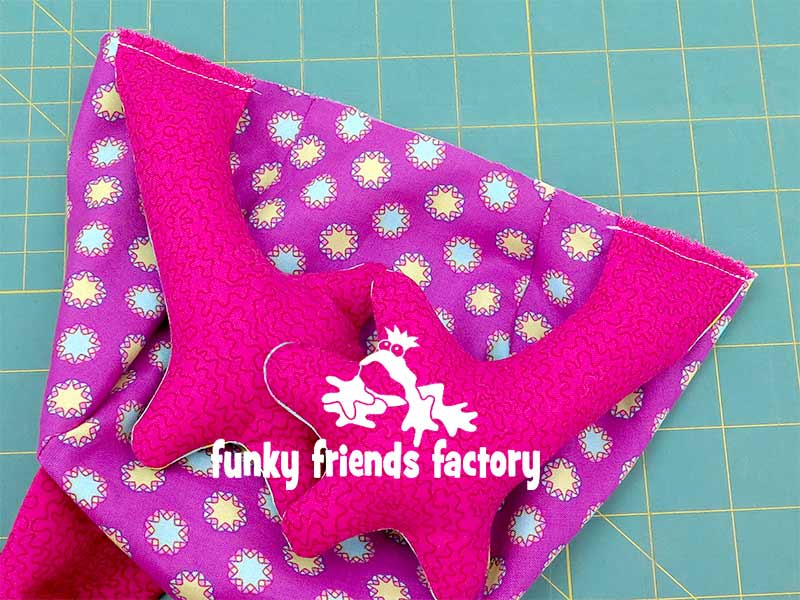
TIP: Again, if the toy is for a child – go back and stitch a row of zig-zag stitches across the arm seams. If you look closely as the photo above you will see that I zig-zagged the whole chest seam, not just at the ARM PIECES. (I just thought this was easier than stopping and restarting the zig -zag stitching, at the other arms – and less threads to cut! Yay!).
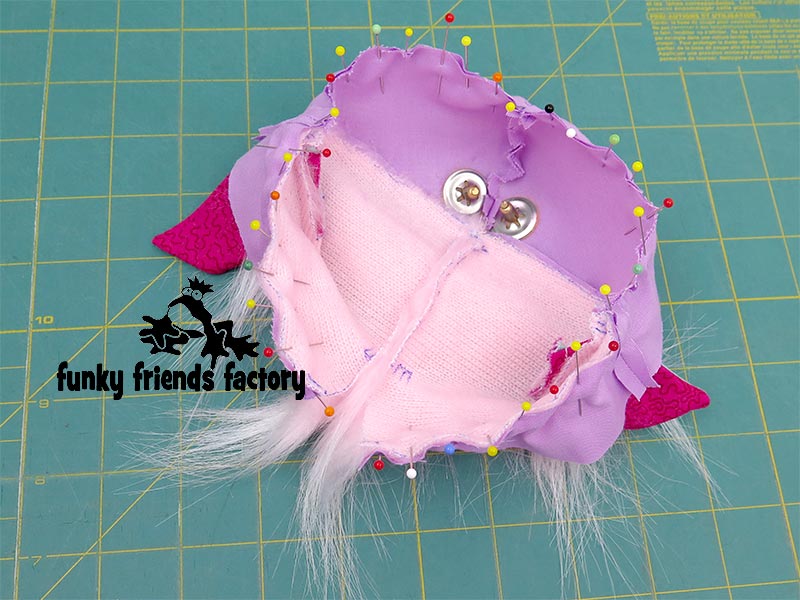
STEP 20a
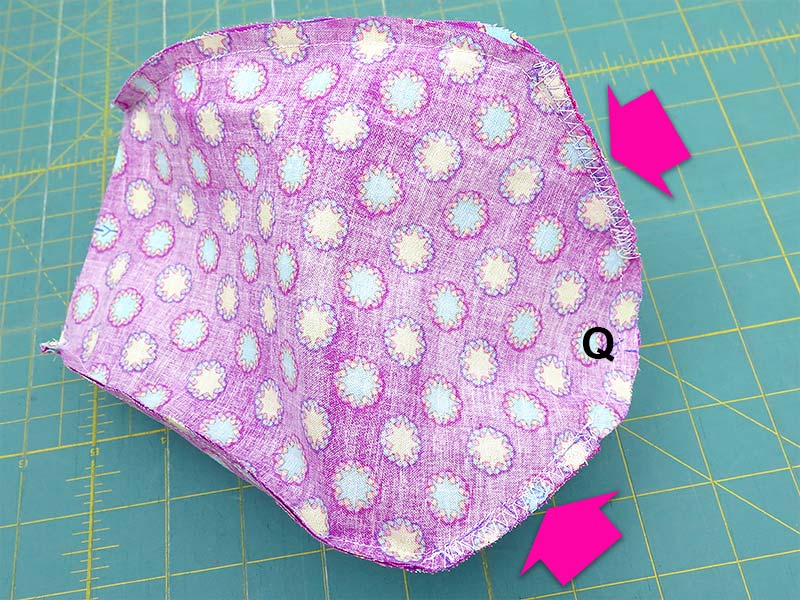
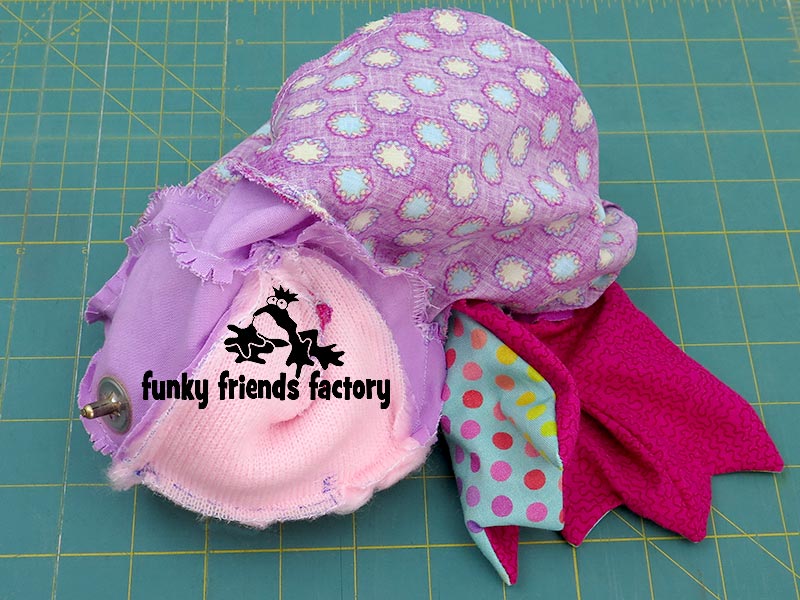
BEFORE you turn your Party Animal right sides out, finish sewing him closed at the back. Pull the head out of the body…
STEP 20b
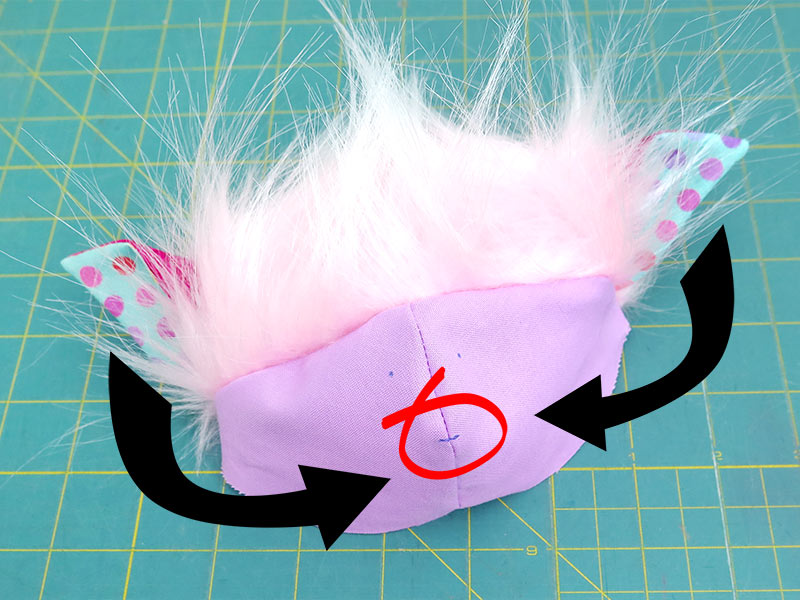
… and pin and sew the HAIR & NECK PIECES closed from the hair and neck seam from E – K – S.
*** DON’T SEW THE STUFFING GAP CLOSED!!!!***
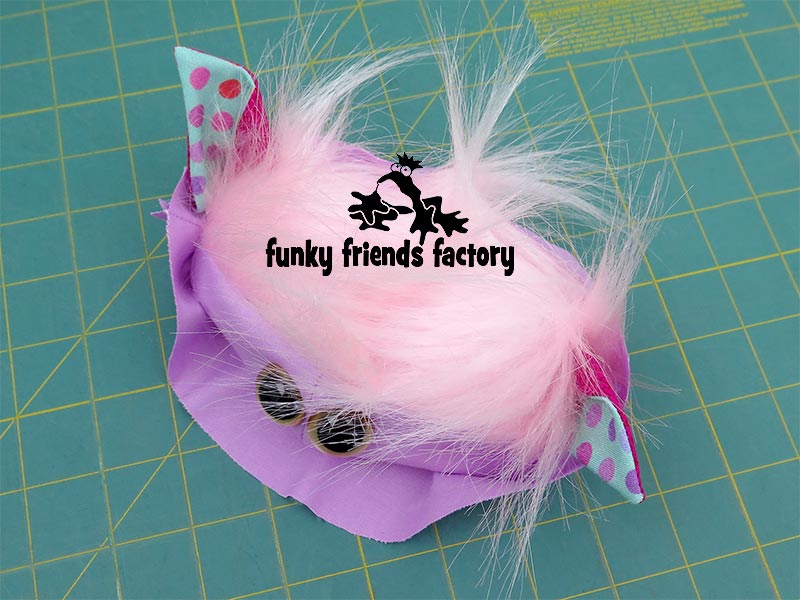
ASSEMBLY:
STEP 21
Turn Party Animal right sides out through the turning gap, between S and P, on the BACK PIECES
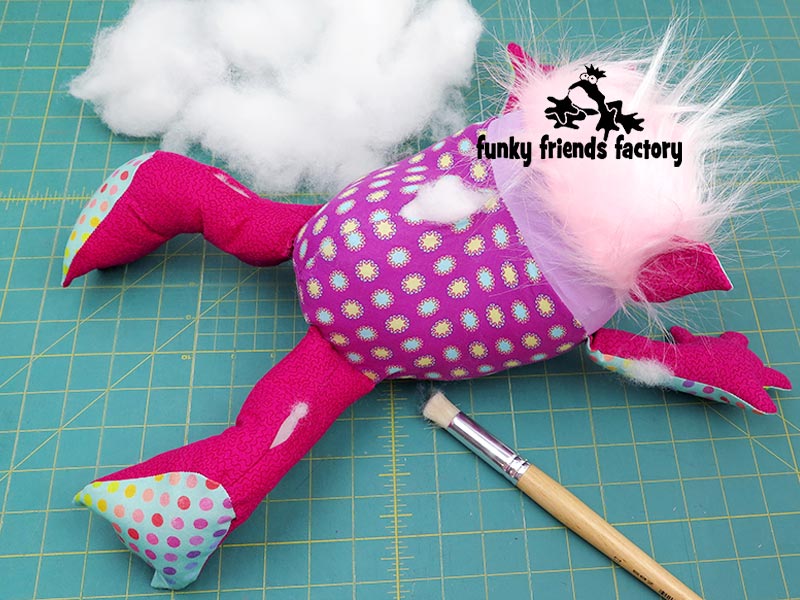
STEP 22
Stuff the head area firmly with toy stuffing, then the body and then the arms and legs. (I use a child’s paintbrush to help me stuff the stuff the fingers and toes very well before stuffing the rest of the limbs.)
Tester’s Tip:
If you want your Party Animal to SIT UP:
don’t stuff the top of the LEGS too much!
The tester’s found Party Animal couldn’t sit up nicely on his own, if you stuffed the top of his legs too much. Check to see if he can sit up nicely BEFORE you sew the stuffing gaps closed – so you can remove a bit of stuffing to get him to sit up.
Party Animal sewn by Melissa Eggleton.
STEP 23
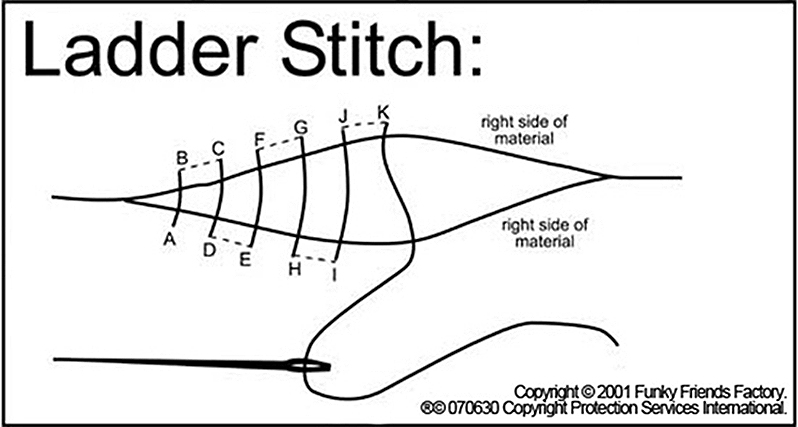
Sew the opening on Party Animal’s BODY, ARM and LEG PIECES closed, using a ladder stitch.
NOSE:
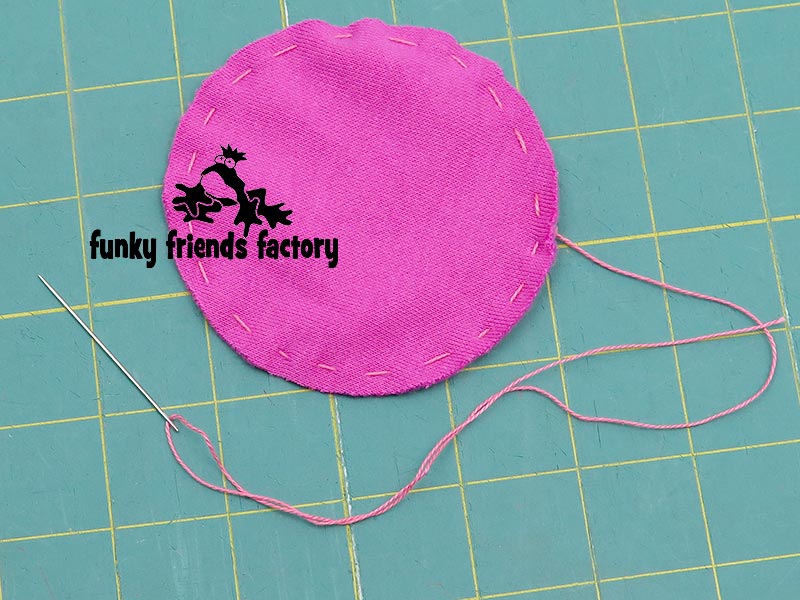
STEP 24a
Use strong thread and a running stitch to sew a gathering stich around the edge of the NOSE PIECE as shown in the pattern markings.
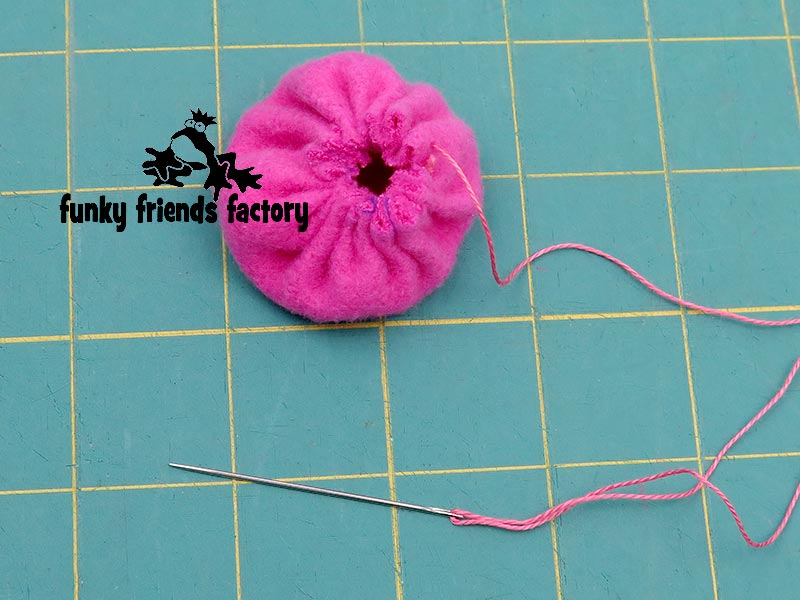
STEP 24b
Pull gently but firmly on the gathering thread to gather the NOSE PIECE to form a cup shape.
STEP 24c
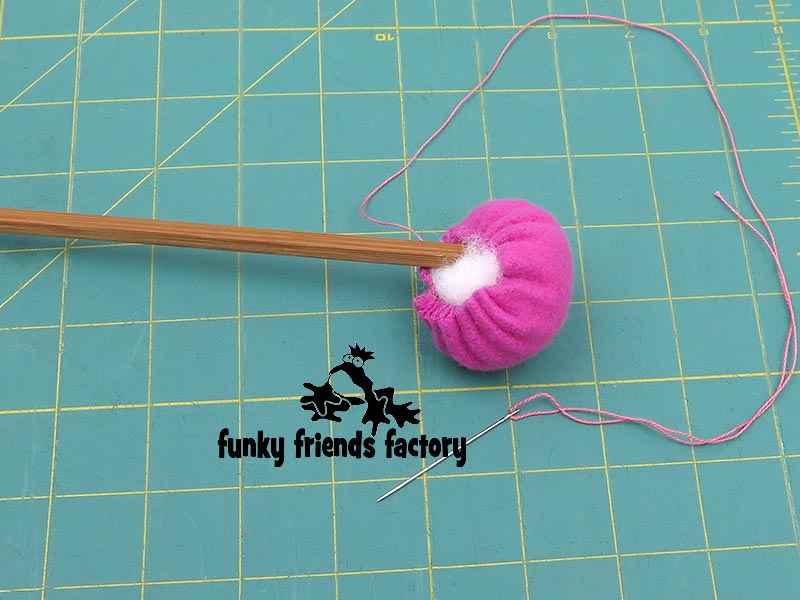
Fill this with toy stuffing – you want it nice and full so Party Animal will have a (big!) ball-shaped nose. Pull tightly to gather the NOSE PIECE to form a round ball shape.
STEP 24d
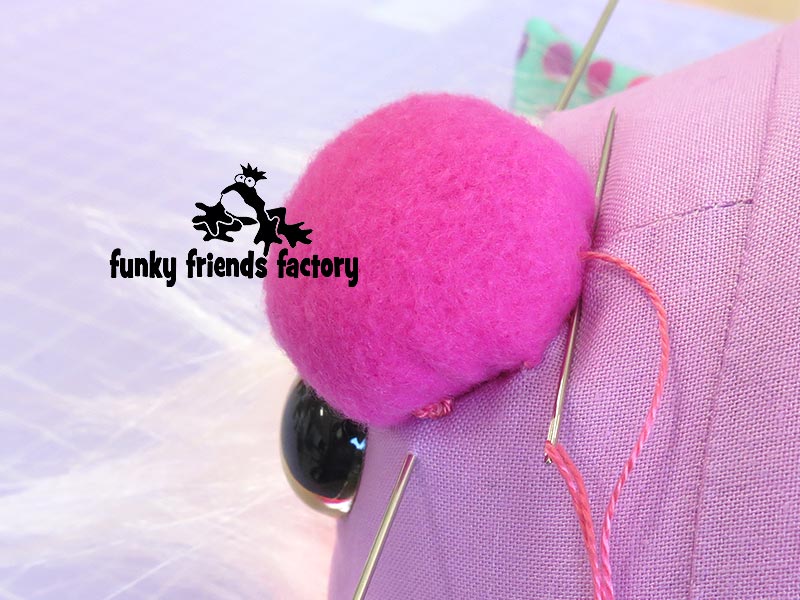
Sew the NOSE PIECE closed, using the stitches to help pull the fabric tight so the nose is fat and ROUND like a ball! (* If you look closely at the photos below, you can see that the nose starts off quite square-ish at first. I stitched back and forth across the back of the nose, until I had pulled the NOSE PIECE into a nice ROUND ball shape!)
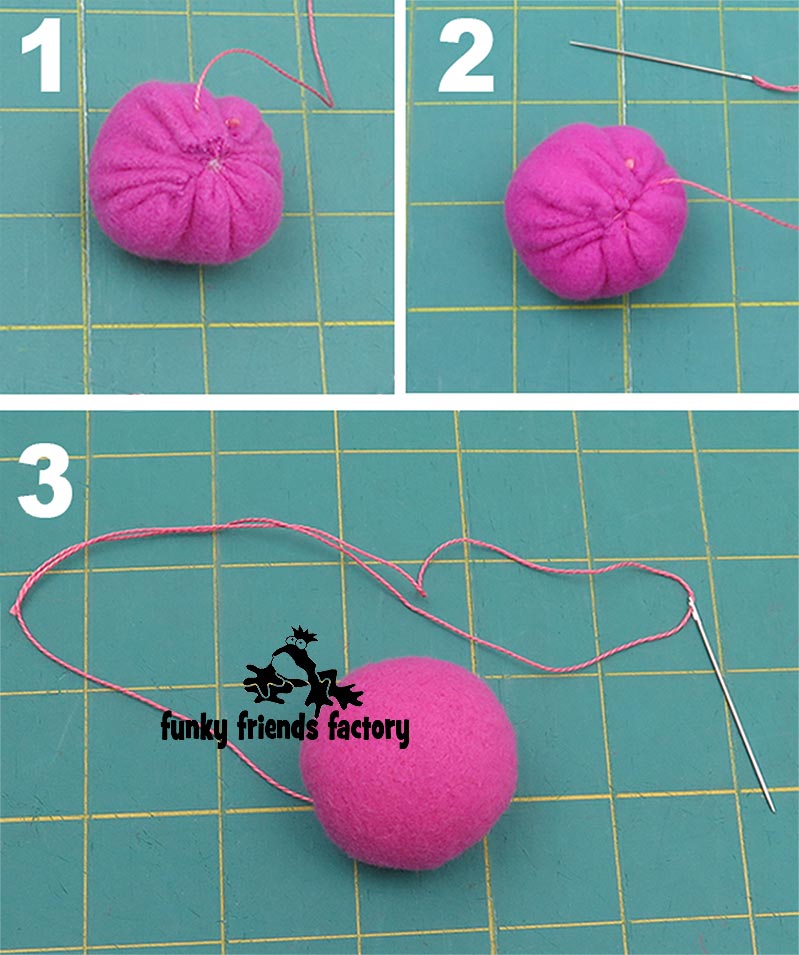
STEP 25a
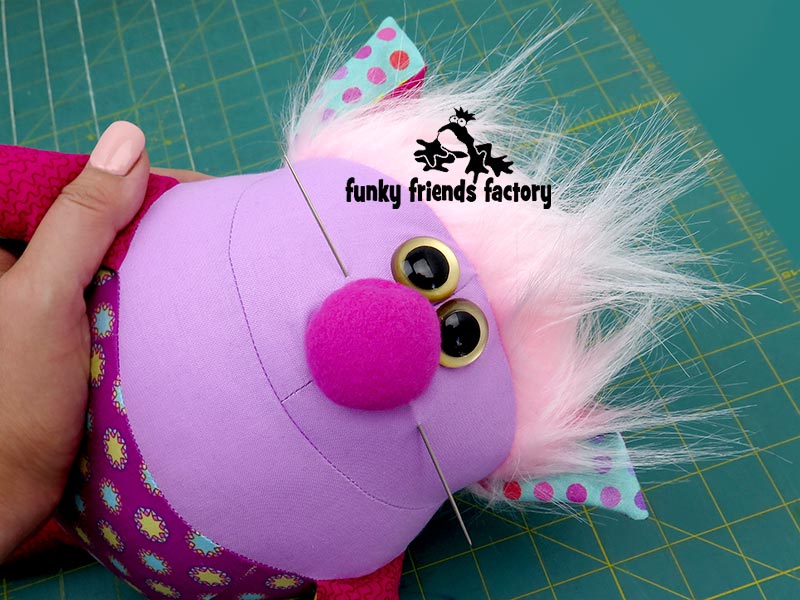
Pin the nose to the FACE PIECES, using the pattern markings to guide you with the position, just below the eyes.
TIP: I like to use a doll needle because it is very long, I can pin the nose on with only one “big pin”! 😊
STEP 25b
Sew the nose in place with a ladder stitch if you want it to be totally invisible. You can also use a simple whip stitch or any kind of stitch you like. (Hide the starting and finishing knots under the nose – you can see the knot peeking out a little between the NOSE and FACE PIECES in the photo below.) I like to go around the nose TWICE to make sure it is very secure and to make it nice and neat.
TIP: I use an elastic band to hold the hands out of my way as I sew the NOSE PIECE on.
ORIGINAL / ALTERNATIVE EYE STYLE!
STEP 26 (OPTIONAL!)
The original Party Animal had what I call “Googly Eyes”. If you want to do these Original / Alternative Eyes, they are done in a similar way to the nose, but I have a step-by-step photo tutorial of HOW to do these eyes ~>
CLICK HERE FOR
GOOGLY EYES TUTORIAL!

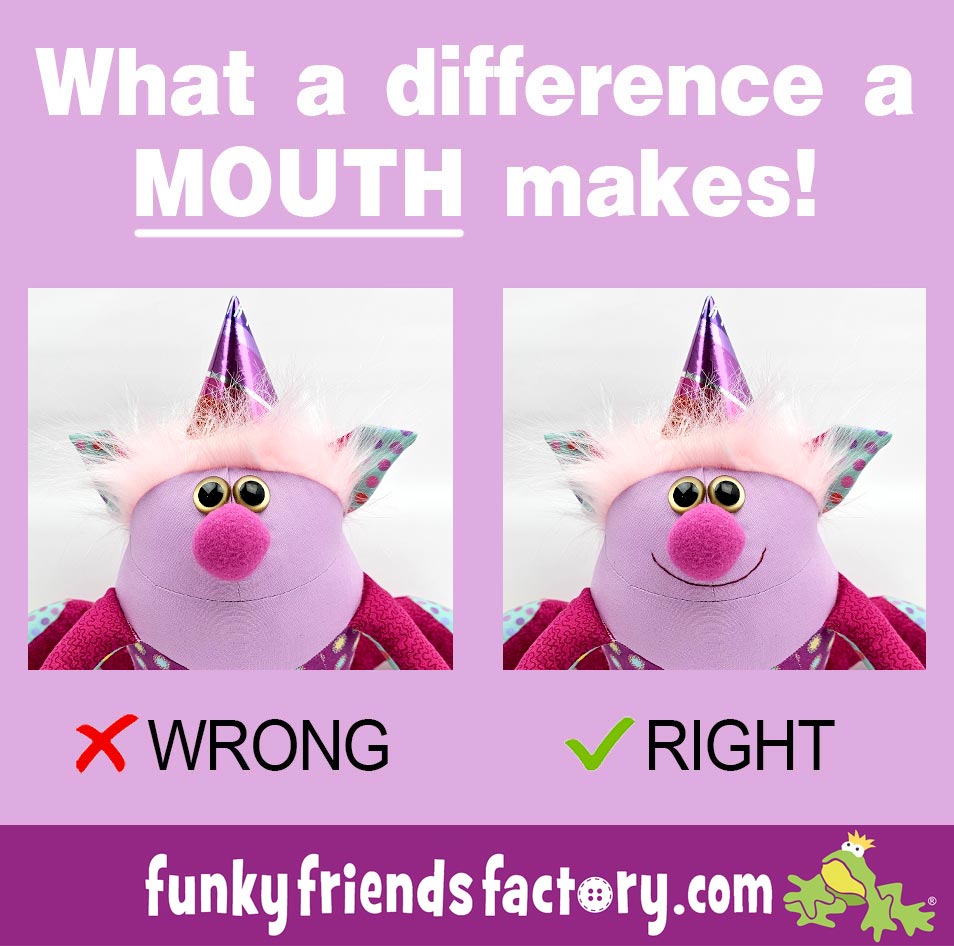
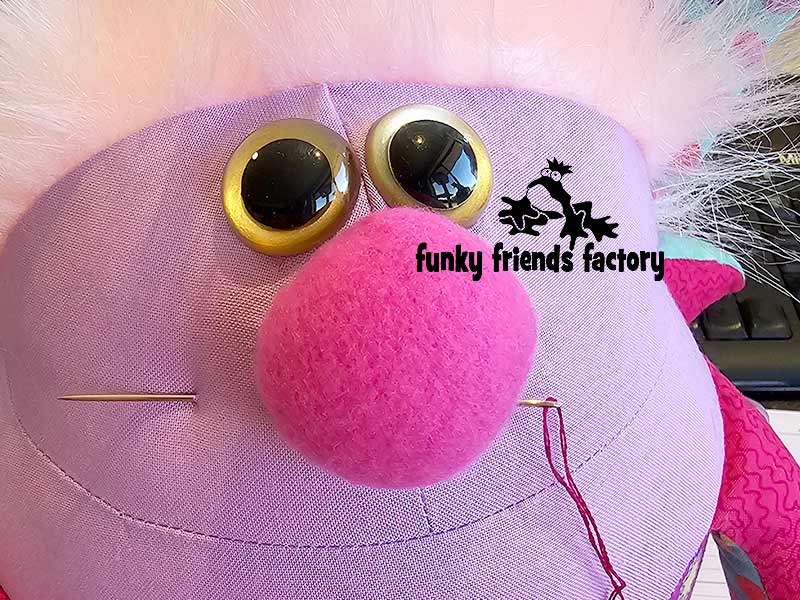
MOUTH – Add a smile.🙂
STEP 27a
Don’t worry if you’ve never done any hand sewing before…
~> Sewing the mouth
is EASY!
Hide your starting knot:
Tie a knot in your thread and insert your needle into the toy in the crease between the NOSE and FACE PIECE. Bring your needle out at the end point of the smile line. Then pull tightly on your thread to pull the knot in and hide it in the nose crease.
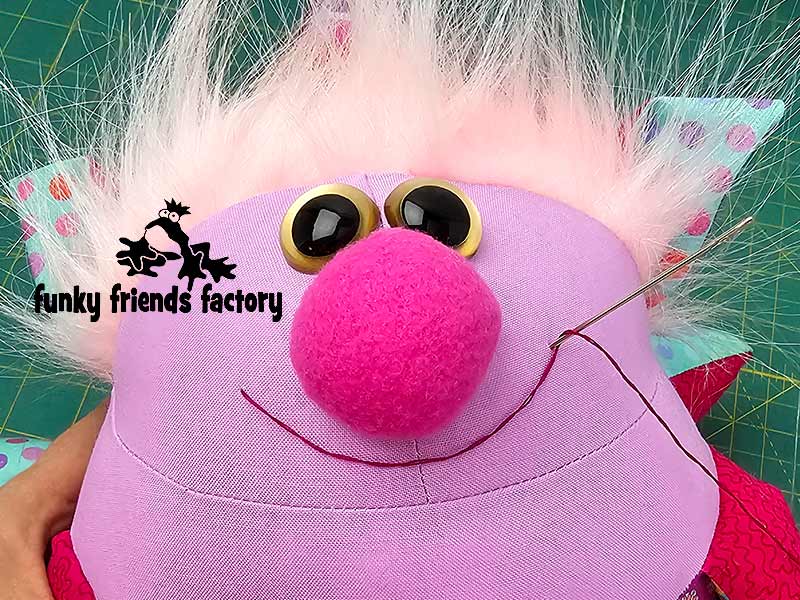
STEP 27b
Draw a smile:
Use another needle /pin for the other side of the smile, wrap the thread over this to get a nice ‘smile shape’. When you are happy with the shape – draw the smile line on the FACE PIECE with a marker. (I used a red Frixion pen. (I have info about LOTS of other options for marking fabric in this blog post.)
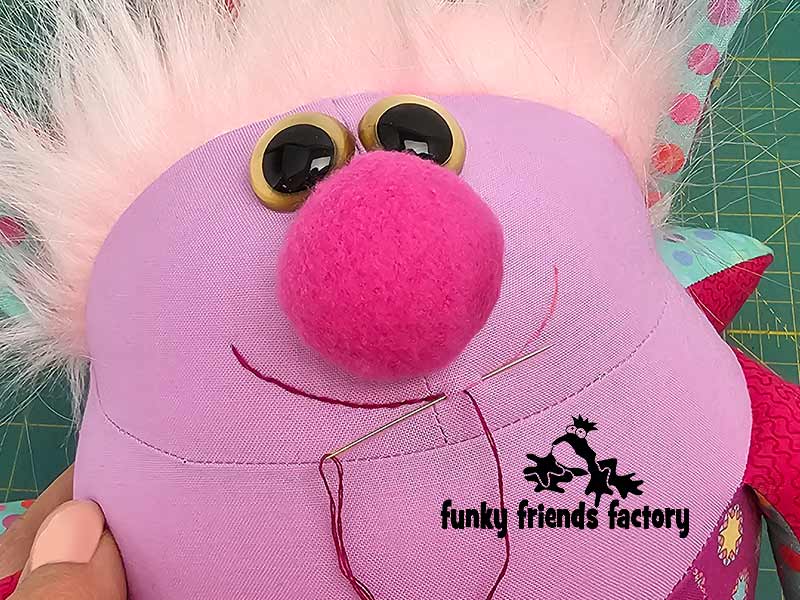
STEP 27c
Stitch the smile:
Sew the mouth with pink/plum coloured embroidery thread (or any colour that will ‘stand out’ against the FACE colour). Use stitches about 3mm/⅛ inch in length along the mouth line.( What stitch type should you use? I prefer a simple “backstitch” or “stem stitch,” but you can use whatever stitch you like best. There are many videos online demonstrating basic embroidery stitches, so consult one if needed.)
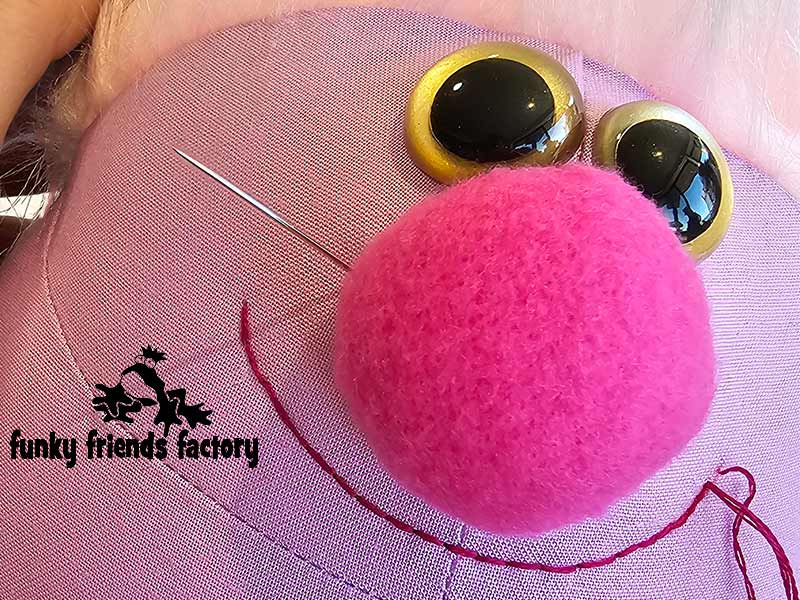
STEP 27d
Finish the smile:
At the end of the smile, sew into the mouth line and come out in the crease between the NOSE and FACE PIECE again.
Don’t cut the thread just yet!!!😵
STEP 27e
Hide the end knot:
Make a small knot in the crease ~> so your stitching won’t unravel. (Do this by sewing a small stitch to make a loop, sew through the loop and pull tight to make a knot). Now you’ll hide the tail of the thread. Insert your needle back into the crease and come out the NOSE. Pull the thread tight, snip it off and the end should pull back into the NOSE!
(You can just see the knot in the photo below – the black arrow is pointing to it!)
Your Party Animal has a happy smile!

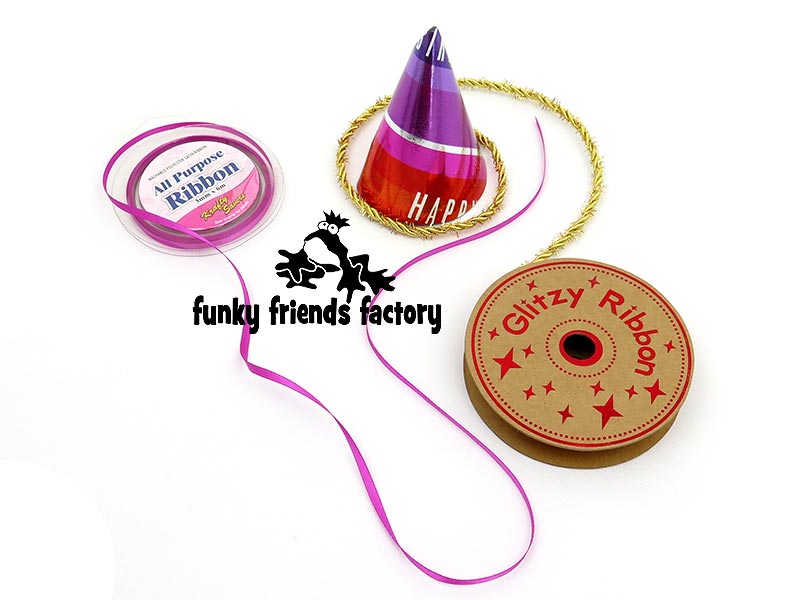
PARTY HAT:
STEP 28a
Cut the PARTY HAT PIECE out of bright card (shiny if possible!) Bend/roll the PARTY HAT into a cone shape. Glue (or staple) the sides of the HAT together. You can glue (or hand sew) some tinsel around the bottom edge of the hat. (Some people have added a pom pom to the top of the HAT which is very cute!)
STEP 28b
Attach a piece of elastic or ribbon to the hat on each side. This must be long enough to stretch down in front of the EARS and around the back of the head, passing just below the FUR PIECES (about 50cm/20inches). Place the PARTY HAT on Party Animal’s head and make sure it’s nice and tight so he can party ALL night without it coming off!
Your Party Animal is
ready to LOVE!
Want to win a
FREE toy pattern?
It’s so EASY to enter our Pattern GIVEAWAY!
![]()
ALL you need to do is post a photo of a FUNKY FRIENDS FACTORY toy that you have made on the Funky Friends Factory Facebook Page .
At the end of each month I draw a winner and post the winner’s name on the Blog the following MONTH. I have an Album on Facebook for all the MAKEROFTHEMONTH winners. You can check it out HERE!
NOT on Facebook? ENTER by email! 😀
*** You can send me your photos by email too!
So come on! Share your photos ~>
The next winner could be YOU!!!
 .
.
Till next time,
Happy Sewing,
Pauline
xxx
![]()
